Starting a vegetable garden in clay soil can feel tricky because clay is dense, slow to drain, and easy to compact. But with the right setup and a few smart habits, you can grow productive vegetables in clay without fighting your soil every weekend. The key is to improve structure (so roots can breathe), manage water (so plants don’t sit soggy), and protect the soil surface (so it doesn’t crust over or turn into hard clods).
- Quick Answer: Starting A Vegetable Garden In Clay Soil
- Understand Your Clay Soil Before You Start
- Signs You’re Working With Clay
- Why Clay Can Struggle With Vegetables
- Two Quick Tests That Save Time
- Choose The Best Garden Setup For Clay Soil
- Option 1: In-Ground Beds With Soil Improvement
- Option 2: Raised Beds (Often The Easiest Win)
- Option 3: Mounded Rows Or Berms
- Quick Comparison Table
- Step-By-Step: How To Start A Vegetable Garden In Clay Soil
- Step 1: Pick A Sunny Site And Plan Your Bed Layout
- Step 2: Work Clay Only When It’s Ready
- Step 3: Loosen The Soil Without Over-Tilling
- Step 4: Add Organic Matter (The Real Fix For Clay)
- Step 5: Avoid “Quick Fix” Amendments That Backfire
- Step 6: Shape The Bed For Drainage
- Step 7: Choose Vegetables That Match Your Conditions
- Step 8: Plant Properly (Especially For Seedlings)
- Step 9: Mulch To Protect The Surface
- Step 10: Water Deeply And Less Often
- Best Vegetables To Grow In Clay Soil
- Planting And Ongoing Care In Clay Soil
- Watering Without Waterlogging
- Prevent Compaction All Season
- Seasonal Maintenance That Improves Clay Each Year
- Common Mistakes To Avoid In Clay Soil Gardens
- Practical Tips For Faster Success In Clay Soil
- FAQ
- Can I Mix Sand Into Clay Soil To Improve Drainage?
- How Deep Should I Amend Clay Soil For Vegetables?
- Do I Need Raised Beds For Clay Soil?
- What Vegetables Grow Best In Clay Soil?
- How Can I Tell If Clay Soil Is Too Wet To Work?
Clay isn’t “bad” soil. It holds nutrients well and can be very fertile once it has better structure. If you focus on adding organic matter, avoiding compaction, and choosing a garden layout that fits your yard, you’ll build a soil that gets easier to work each season. Ready to make clay work for you?
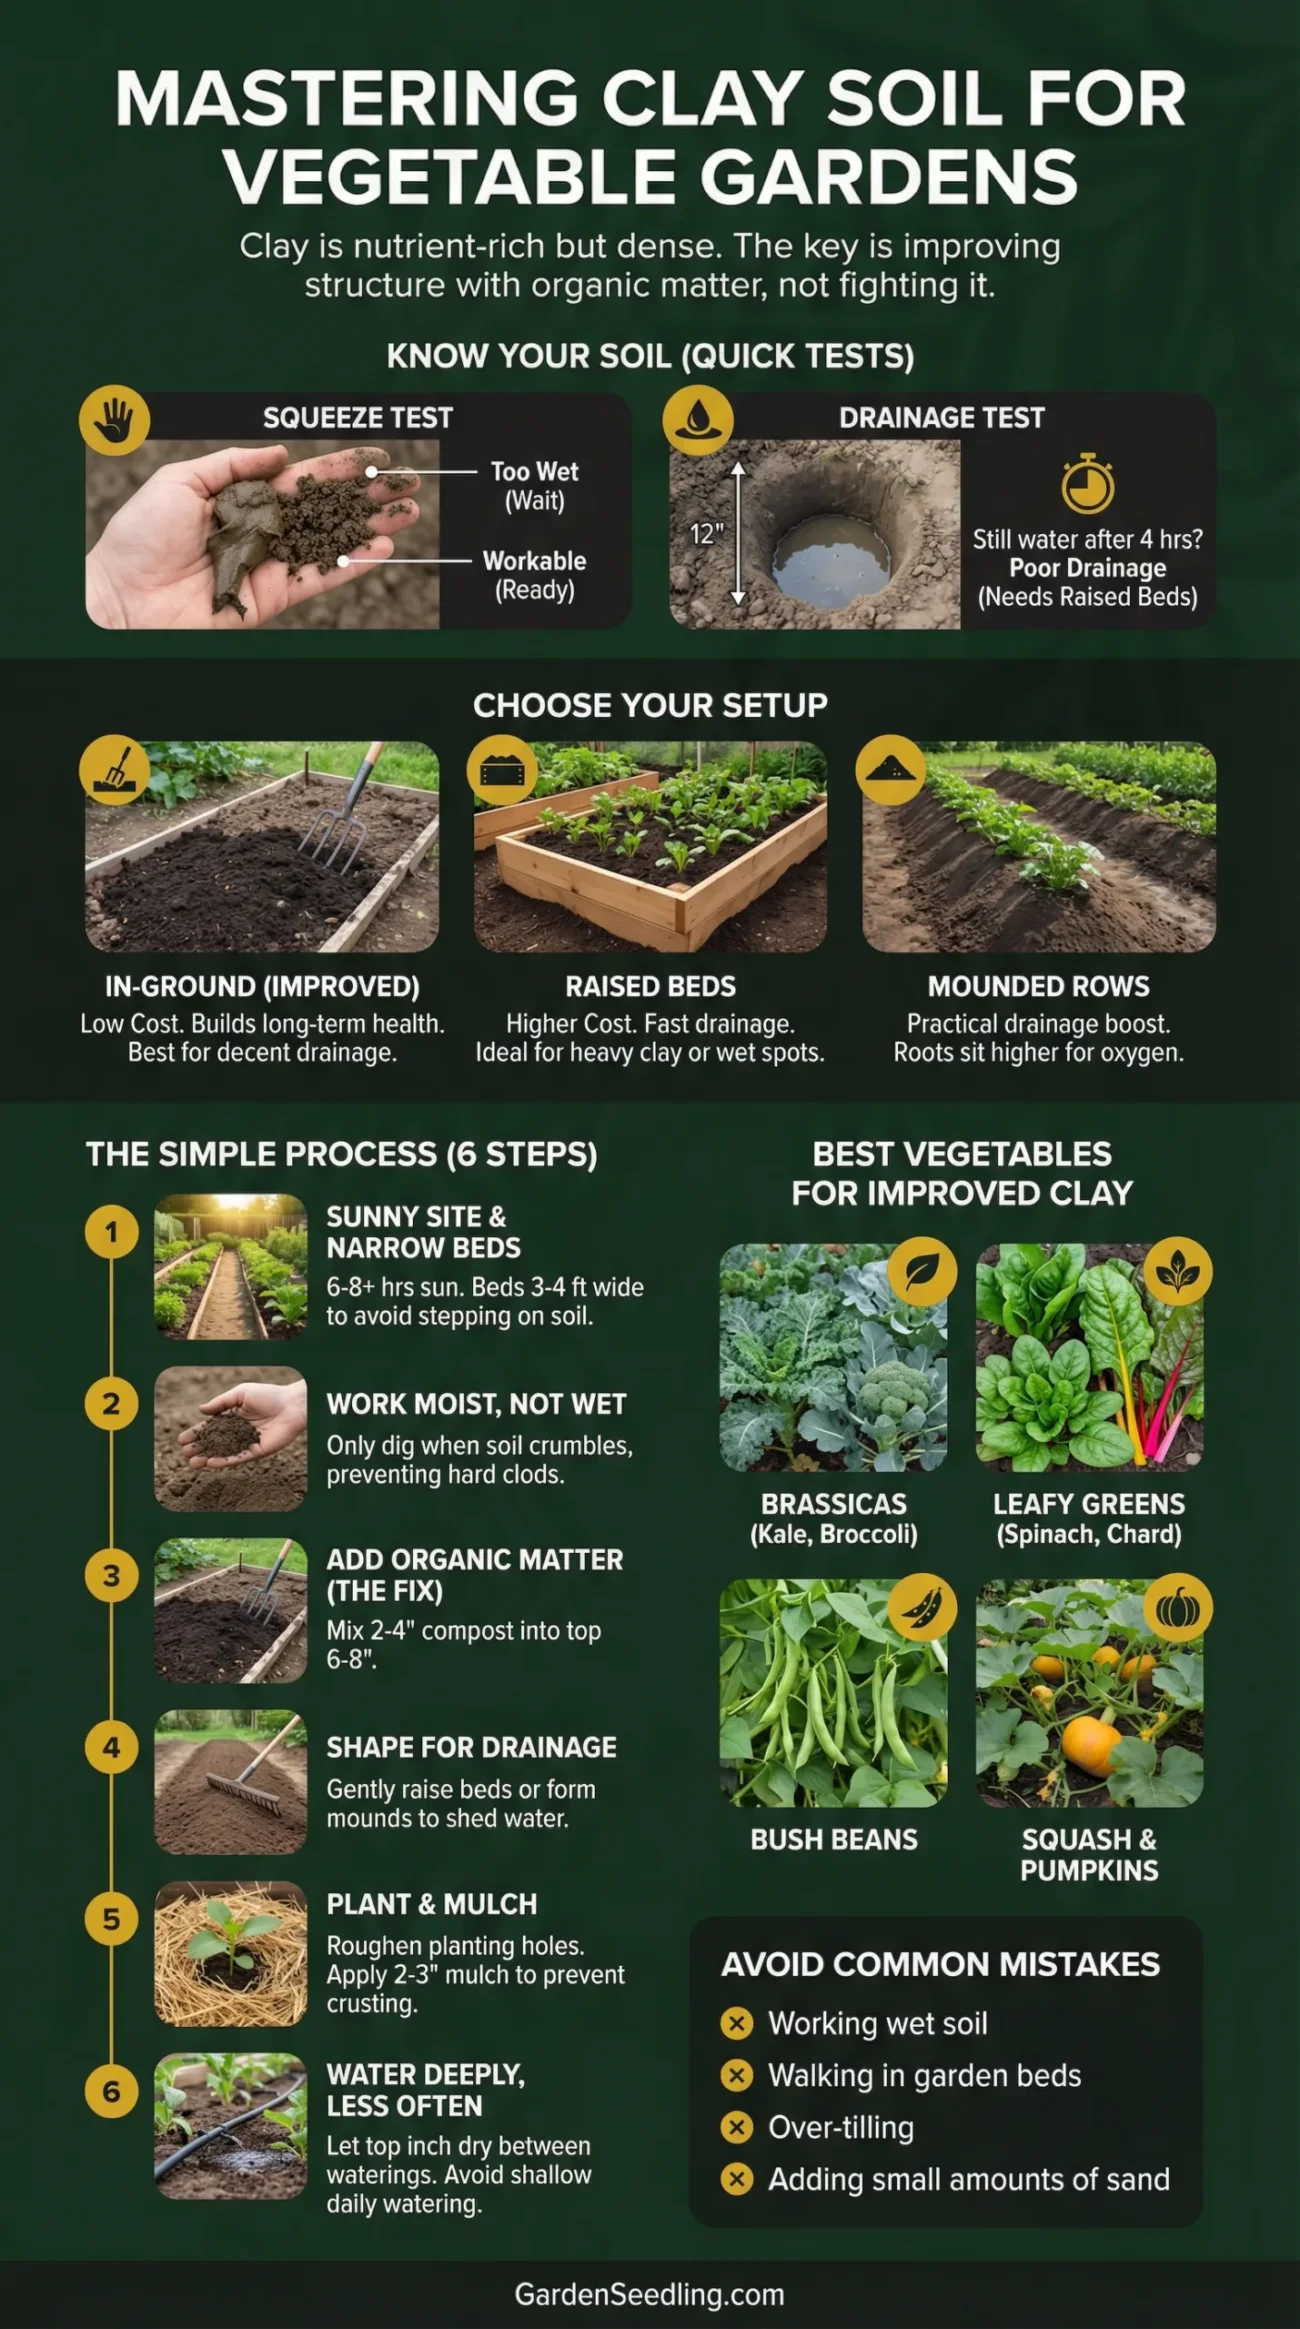
Quick Answer: Starting A Vegetable Garden In Clay Soil
If you want the simplest plan, do this:
- Pick a sunny spot and keep garden beds narrow so you don’t step on them.
- Only work clay when it’s moist—not wet—to avoid turning it into bricks.
- Add 2–4 inches of compost on top and mix it into the top 6–8 inches (or build raised beds and fill with a quality mix).
- Improve drainage with bed shaping (raised rows, mounds) and mulched paths.
- Mulch after planting to prevent crusting, cracking, and weeds.
- Water deeply but less often, and avoid daily light watering.
Understand Your Clay Soil Before You Start
Clay soil is made of very small particles that pack tightly together. That’s why it can feel sticky when wet and rock-hard when dry. Once you understand how clay behaves, the fixes feel a lot more logical.
Signs You’re Working With Clay
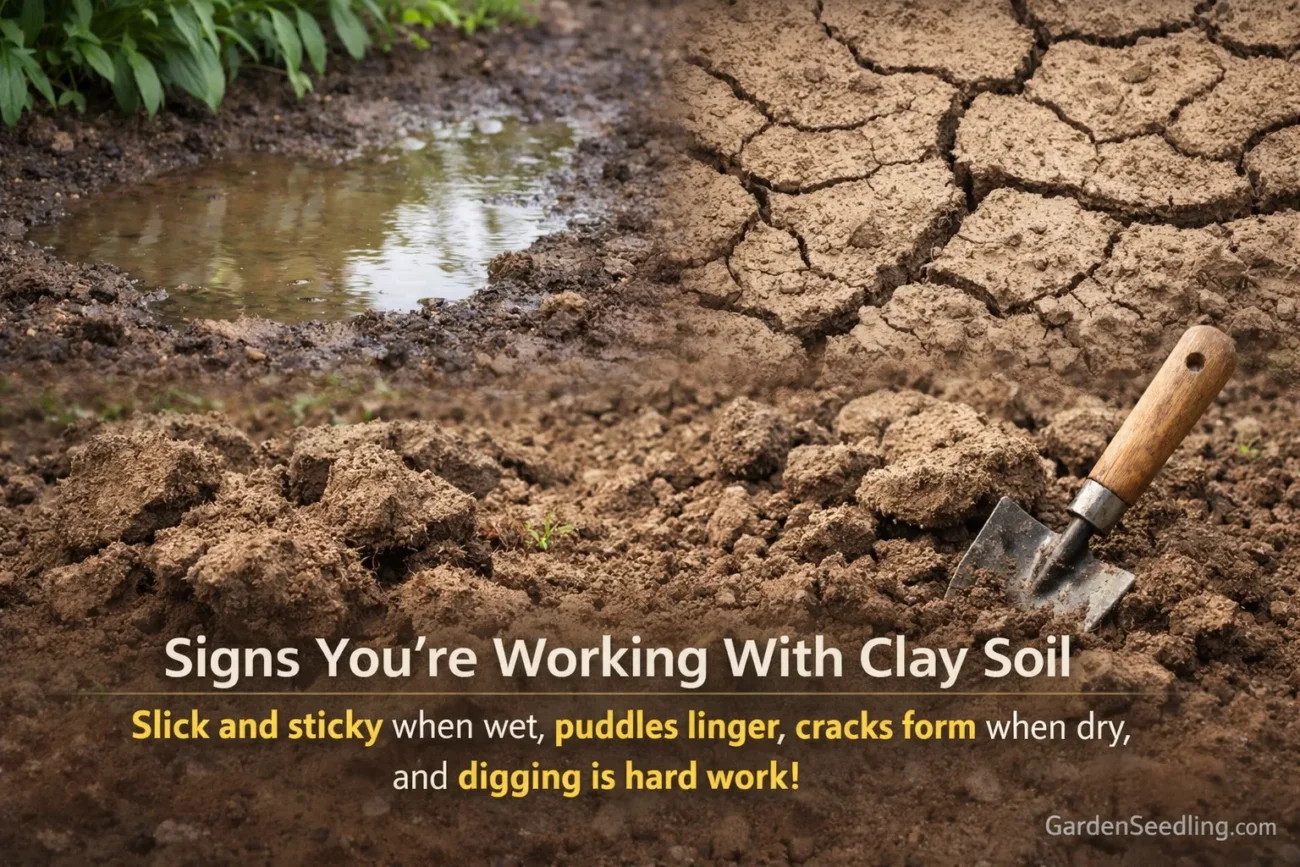
- Soil feels slick and sticky when wet, and forms a ribbon when squeezed.
- Puddles linger after rain and the surface dries slowly.
- Ground cracks in dry weather and forms hard clumps.
- Digging takes effort, especially in summer.
Why Clay Can Struggle With Vegetables
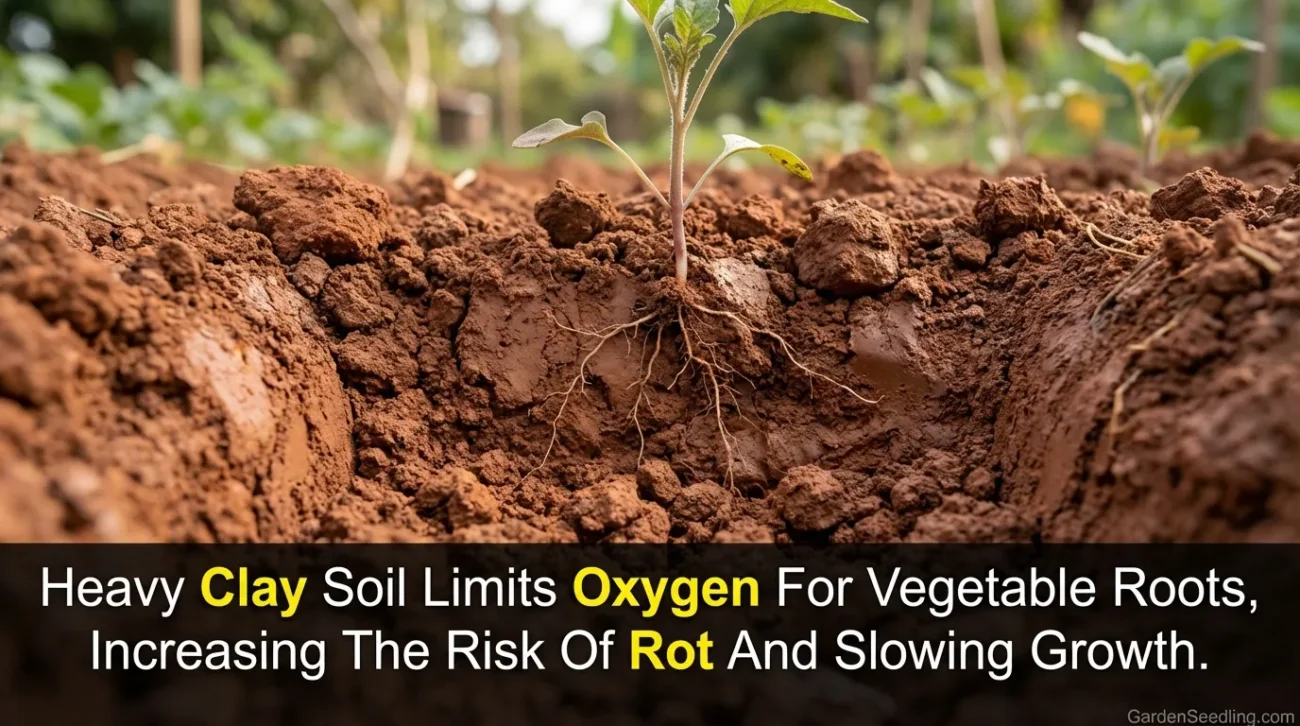
Vegetable roots need oxygen as much as they need water. In heavy clay, pore space is limited, so after rain or overwatering, roots may sit in saturated soil. This can slow growth and increase the risk of rot. On the flip side, clay can dry into a tight crust that makes it harder for seedlings to emerge. The goal is to create more crumbly structure so water drains better and roots can spread.
Two Quick Tests That Save Time
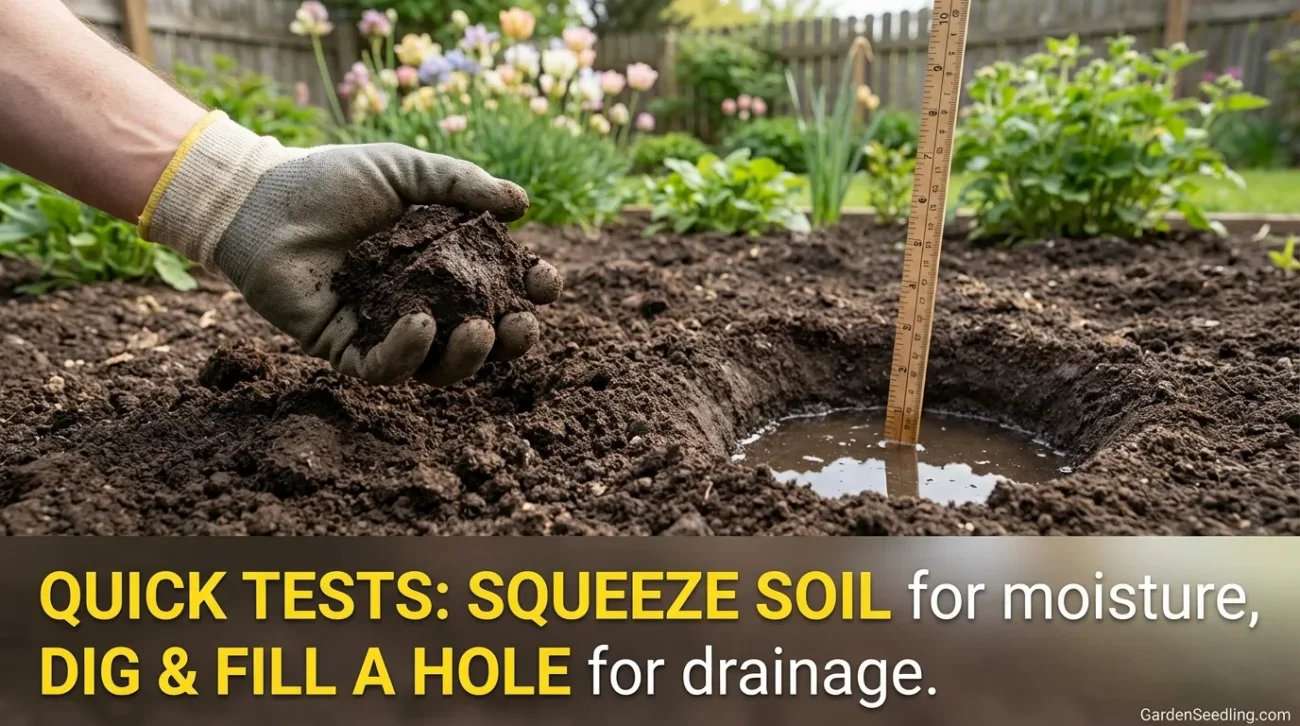
Moisture squeeze test: Grab a handful of soil and squeeze. If it smears like putty and stays in a shiny ball, it’s too wet to work. If it crumbles when you poke it, it’s workable. This one habit prevents most clay-soil problems.
Simple drainage test: Dig a hole about 12 inches deep and wide, fill it with water, and let it drain once. Then refill it and time how long it takes to empty. If it still has water after 4 hours, drainage is slow and you’ll benefit from raised beds, mounds, or improved grading.
Choose The Best Garden Setup For Clay Soil
You can garden successfully in clay using several approaches. The “best” one depends on your budget, how much time you want to invest up front, and how wet your yard gets after rain.
Option 1: In-Ground Beds With Soil Improvement
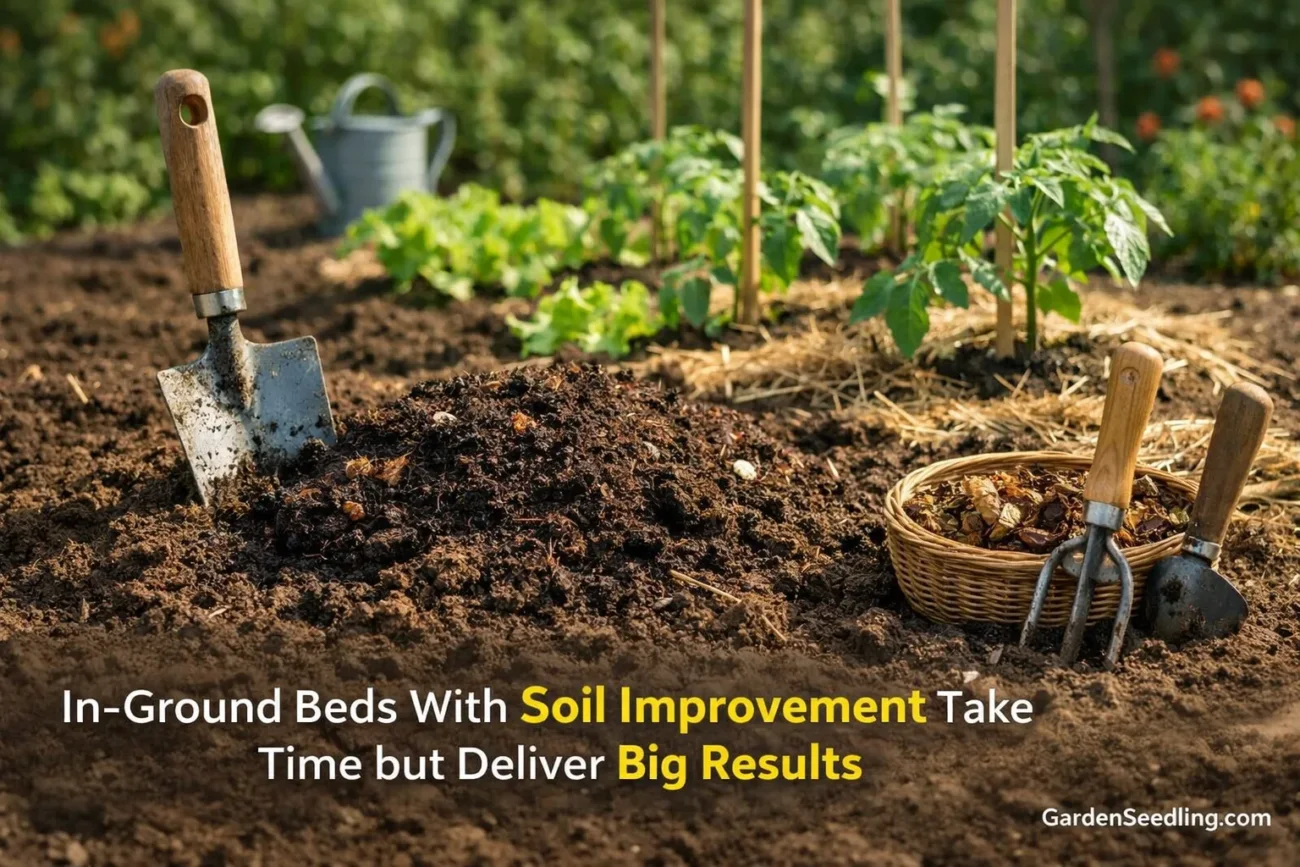
This works well if your yard doesn’t stay soggy for days. You’ll loosen the top layer, add organic matter, and build soil structure over time. It’s the most budget-friendly option, but it takes patience. Expect noticeable improvement in one season, and a big difference after 2–3 seasons of steady compost additions.
Option 2: Raised Beds (Often The Easiest Win)
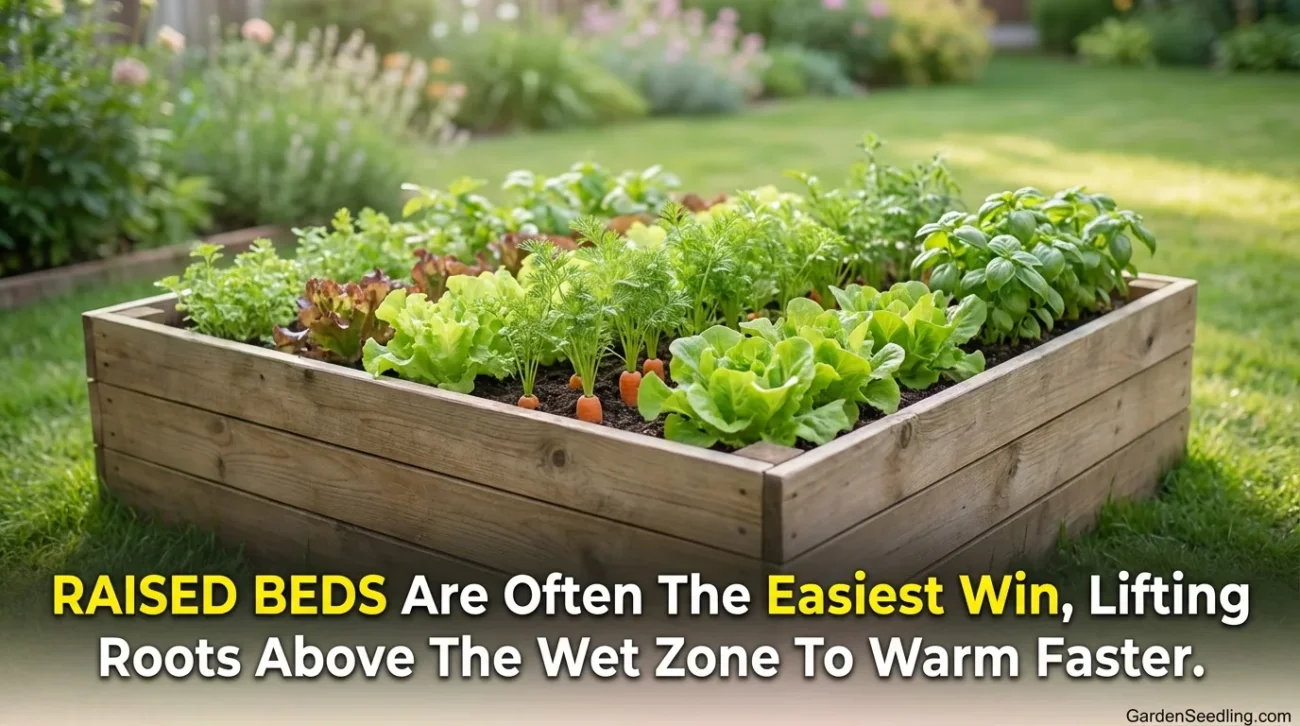
Raised beds are ideal for very heavy clay or low spots where water collects. They lift roots above the wet zone and warm faster in spring. You can place them right over clay, but plan for good drainage and add a thick layer of organic material beneath or loosen the ground under the bed so water can move down.
Option 3: Mounded Rows Or Berms
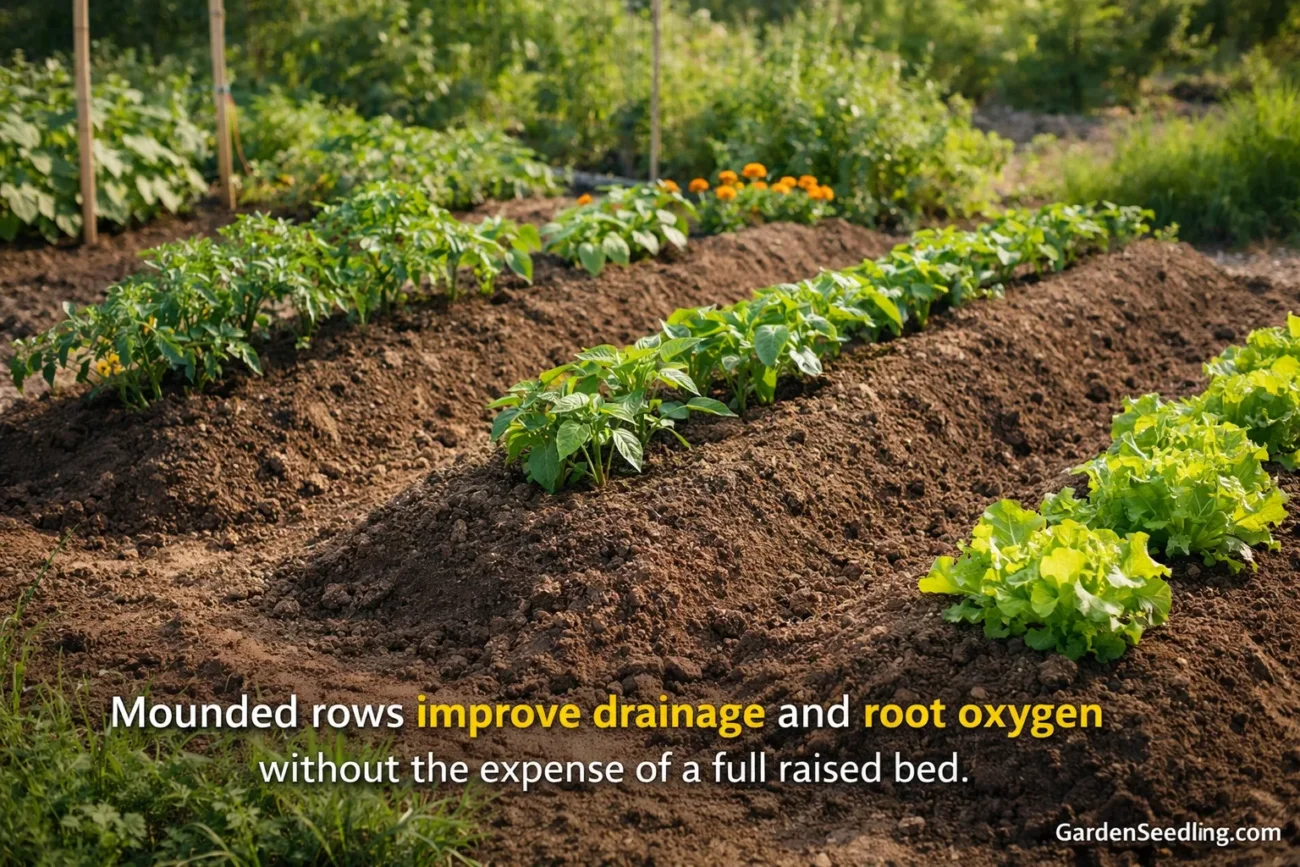
If you don’t want lumber, mounded rows are a practical middle path. You shape soil into gentle ridges and plant on top. This improves drainage and root oxygen without the cost of a full raised bed build.
Quick Comparison Table
| Setup | Cost | Best For | Key Benefit |
|---|---|---|---|
| In-Ground Improved Beds | Low | Clay that’s not constantly wet | Builds long-term soil health |
| Raised Beds | Medium–High | Very heavy clay or poor drainage | Fast drainage and earlier planting |
| Mounded Rows/Berms | Low–Medium | Budget-friendly drainage boost | Roots sit higher and breathe better |
| Containers/Grow Bags | Medium | Patios, small spaces, wet yards | Total control of soil mix |
Step-By-Step: How To Start A Vegetable Garden In Clay Soil
This step-by-step plan works for both in-ground beds and mounded rows. If you’re building raised beds, you can skip some digging and focus more on bed prep and soil mix.
Step 1: Pick A Sunny Site And Plan Your Bed Layout
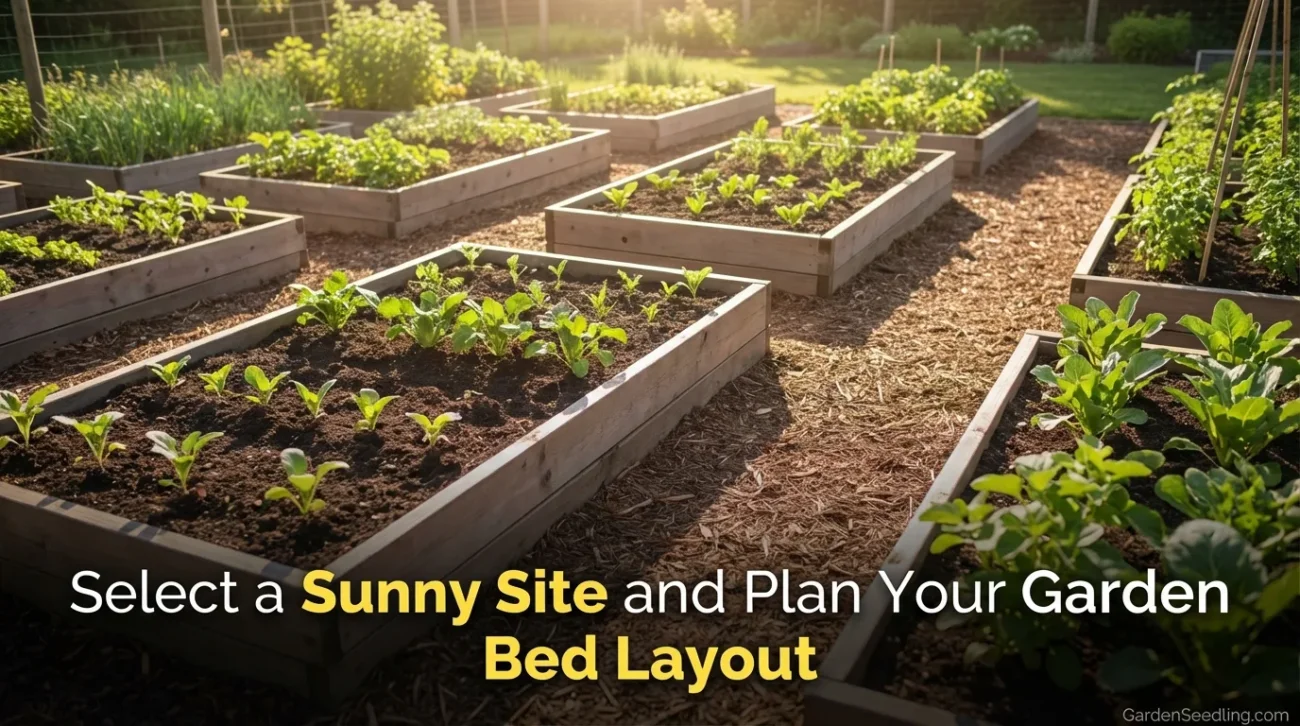
Most vegetables need at least 6–8 hours of sun. In clay soil, layout matters even more because foot traffic compacts the ground. Aim for beds that are 3–4 feet wide so you can reach the center from the sides. Keep paths permanent, and mulch them to reduce mud and compaction.
Step 2: Work Clay Only When It’s Ready
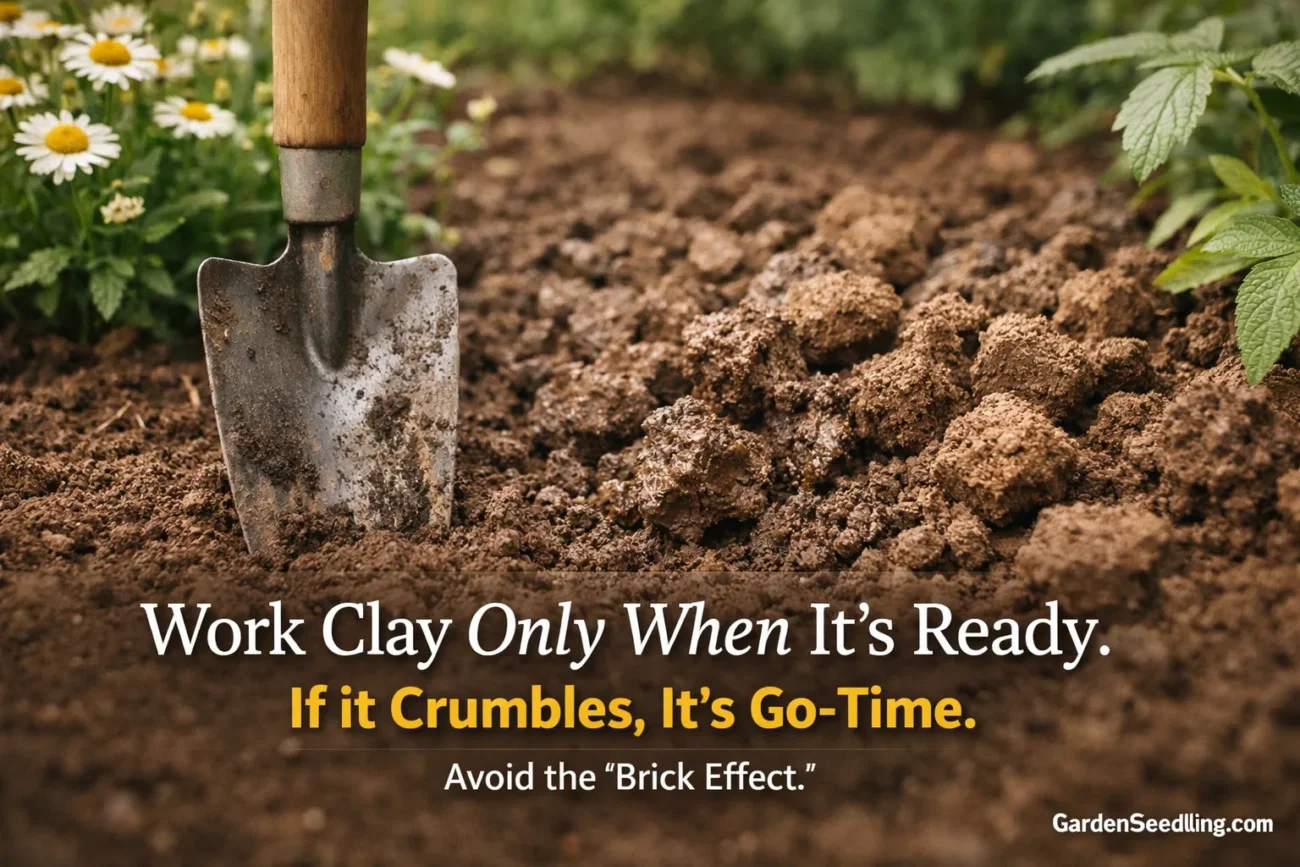
If you dig or till clay when it’s wet, you crush soil structure and create hard clods that can last for months. Use the squeeze test. If the soil forms a sticky ribbon, wait. If it crumbles, it’s go-time. This prevents the “brick effect.”
Step 3: Loosen The Soil Without Over-Tilling
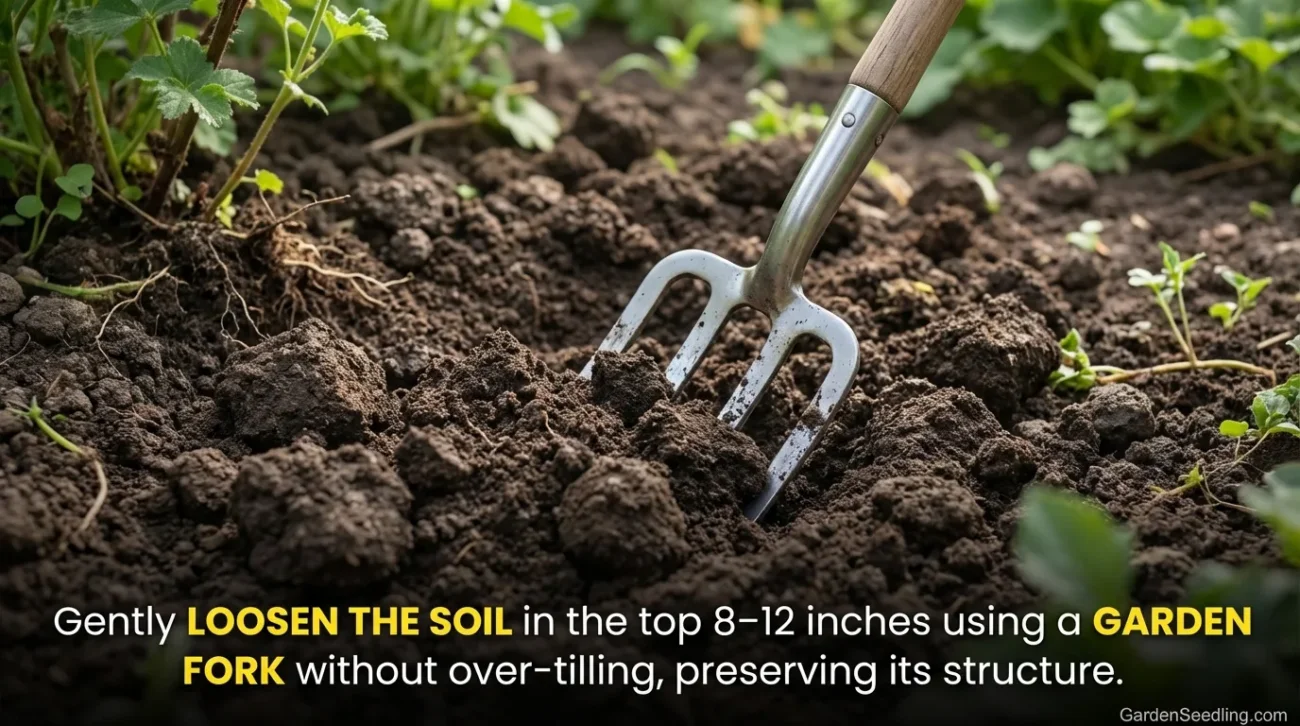
For a new bed, loosen the top 8–12 inches using a garden fork or broadfork. If your soil is extremely compacted, loosening deeper can help, but you don’t need to pulverize everything. Over-tilling can break aggregates and make clay settle back into a tight layer.
Step 4: Add Organic Matter (The Real Fix For Clay)
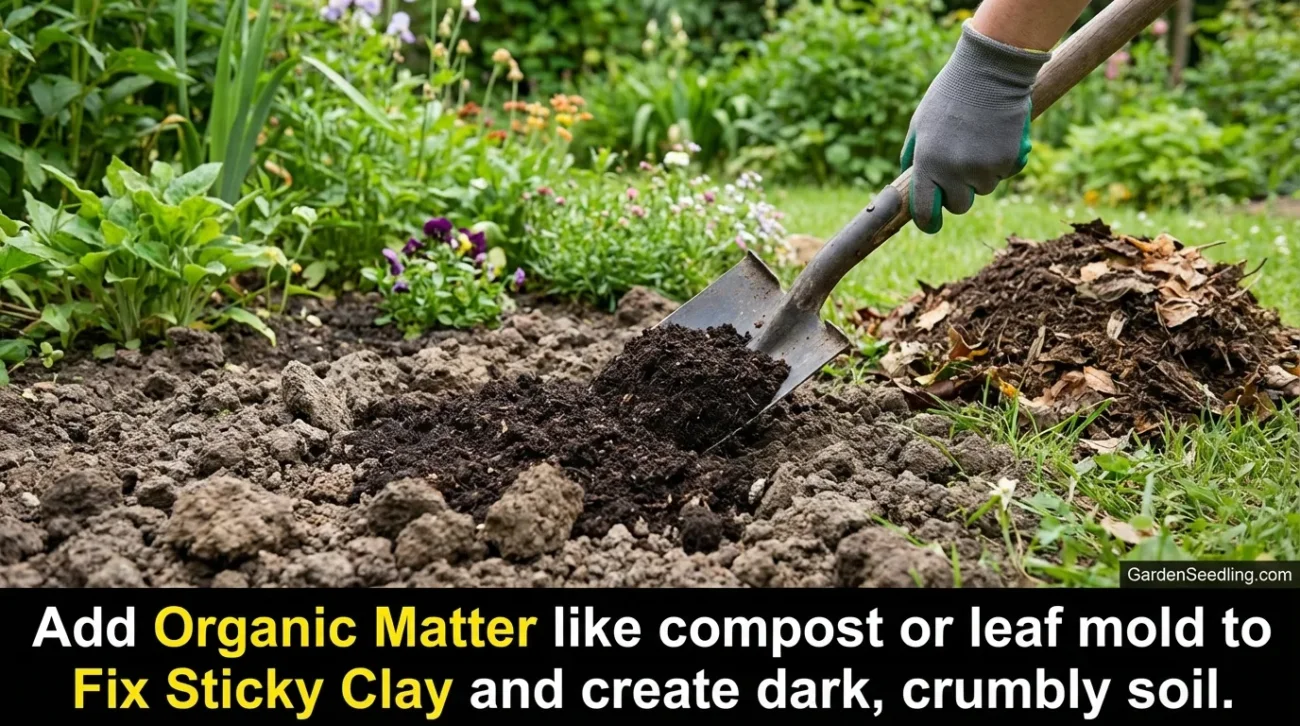
Organic matter is what turns sticky clay into dark, crumbly soil. Spread 2–4 inches of finished compost over the bed and mix it into the top 6–8 inches. If compost is limited, use what you have and plan to repeat each season. Leaf mold, well-aged manure, and composted garden waste also help.
- For best results, add compost in spring before planting and again in fall.
- Use fully composted materials so they don’t steal nitrogen as they break down.
Step 5: Avoid “Quick Fix” Amendments That Backfire
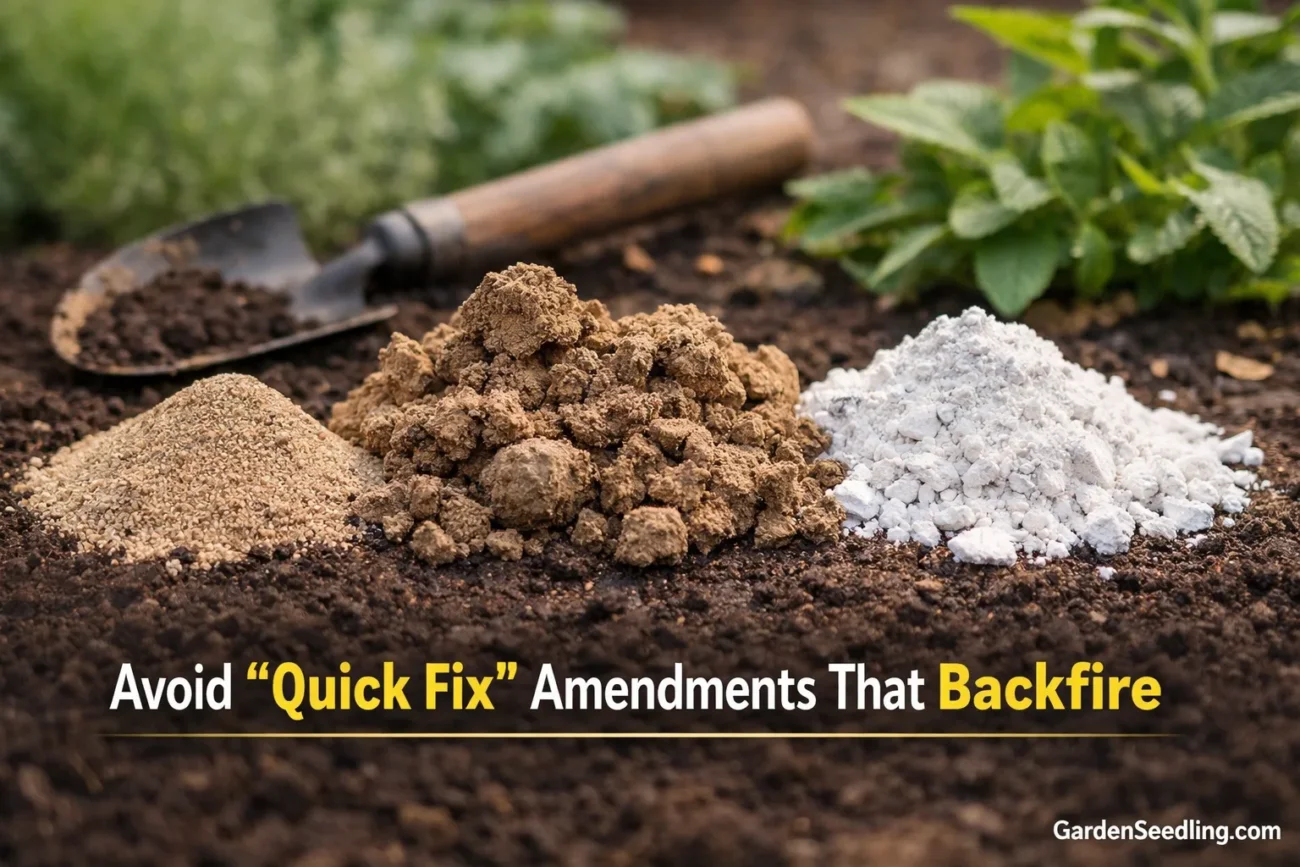
One common mistake is adding a little sand to clay, which can create a dense, concrete-like texture. If you want to change texture, focus on organic matter first. Another often-misused product is gypsum. Gypsum can help certain soil chemistry issues, but it’s not a universal clay cure. If you’re considering gypsum, a soil test is the safest way to know whether it will help.
Step 6: Shape The Bed For Drainage
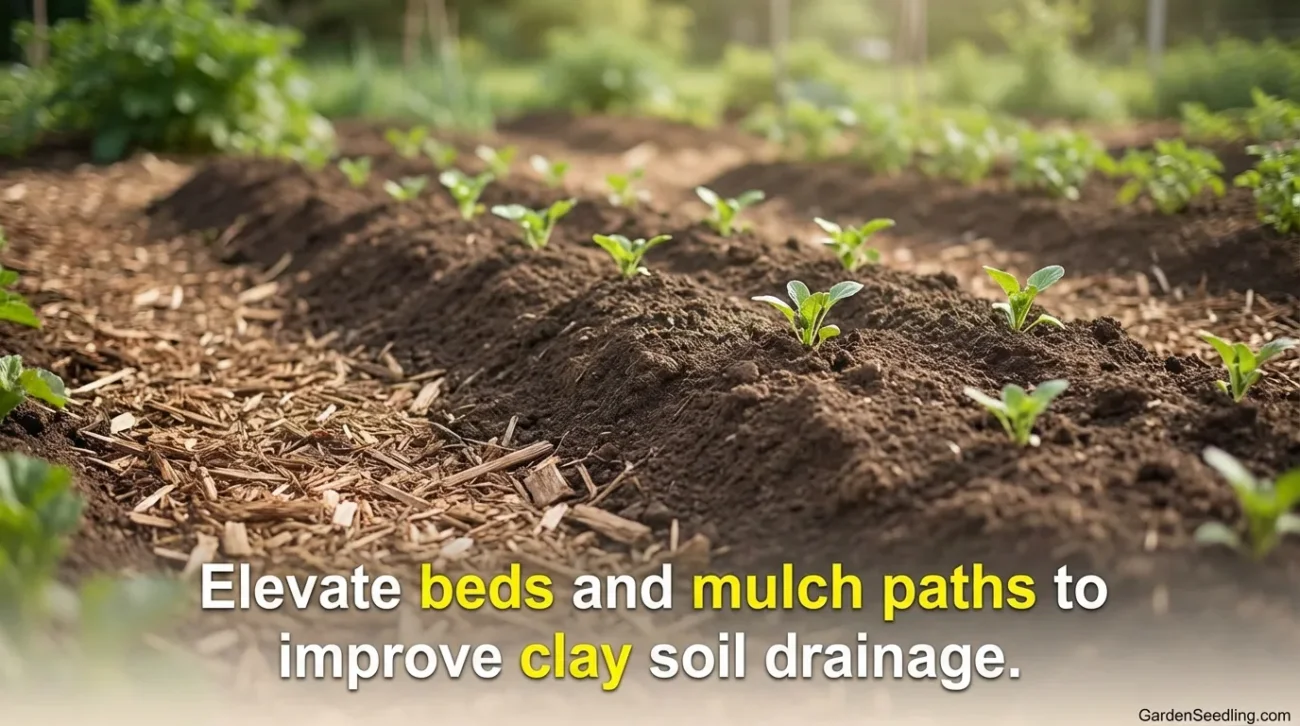
In clay, bed shape improves performance fast. Rake your bed slightly higher than the paths, or form gentle mounds. Even a few inches of height helps excess water move away from roots. Mulch the paths with wood chips or shredded leaves to keep the area walkable and reduce soil splash.
Step 7: Choose Vegetables That Match Your Conditions
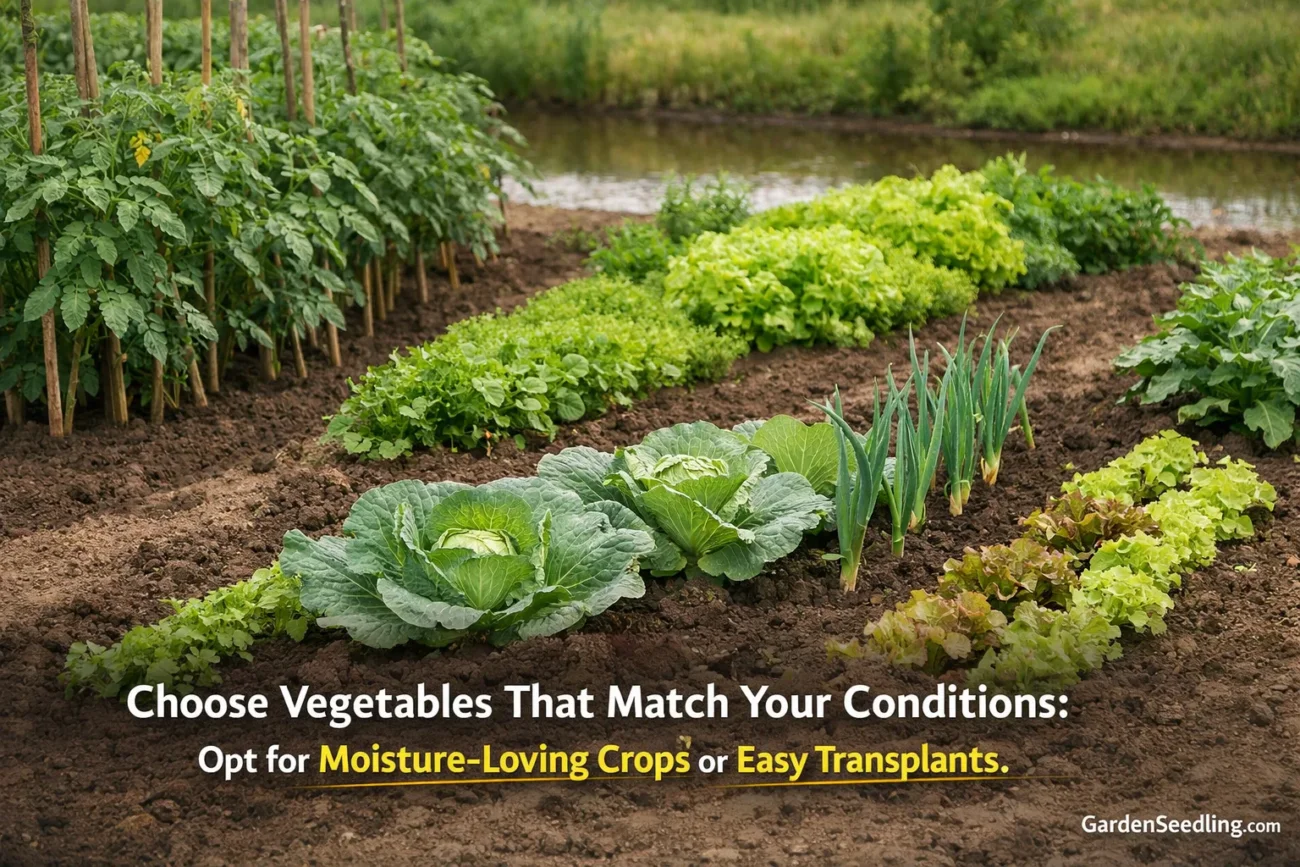
Most vegetables can grow in improved clay, but some handle heavier ground better than others. If your area stays wet in spring, start with transplants instead of direct-seeding slow germinators. You can also choose crops that tolerate moisture better while your soil improves.
Step 8: Plant Properly (Especially For Seedlings)
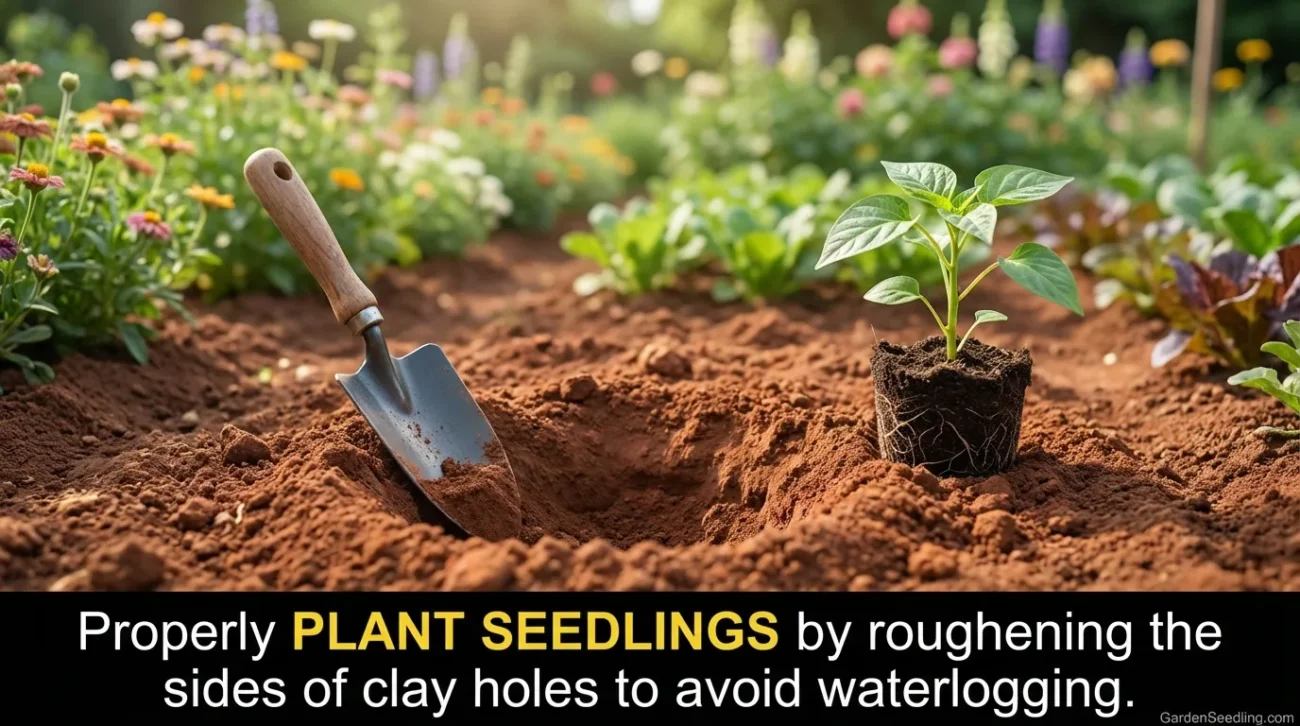
When transplanting into clay, avoid digging a smooth, glazed hole. That slick surface can act like a pot and hold water. Roughen the sides of the hole with a hand tool, place the plant, then backfill gently. Don’t pack the soil down hard; firm it just enough to remove air pockets.
Step 9: Mulch To Protect The Surface
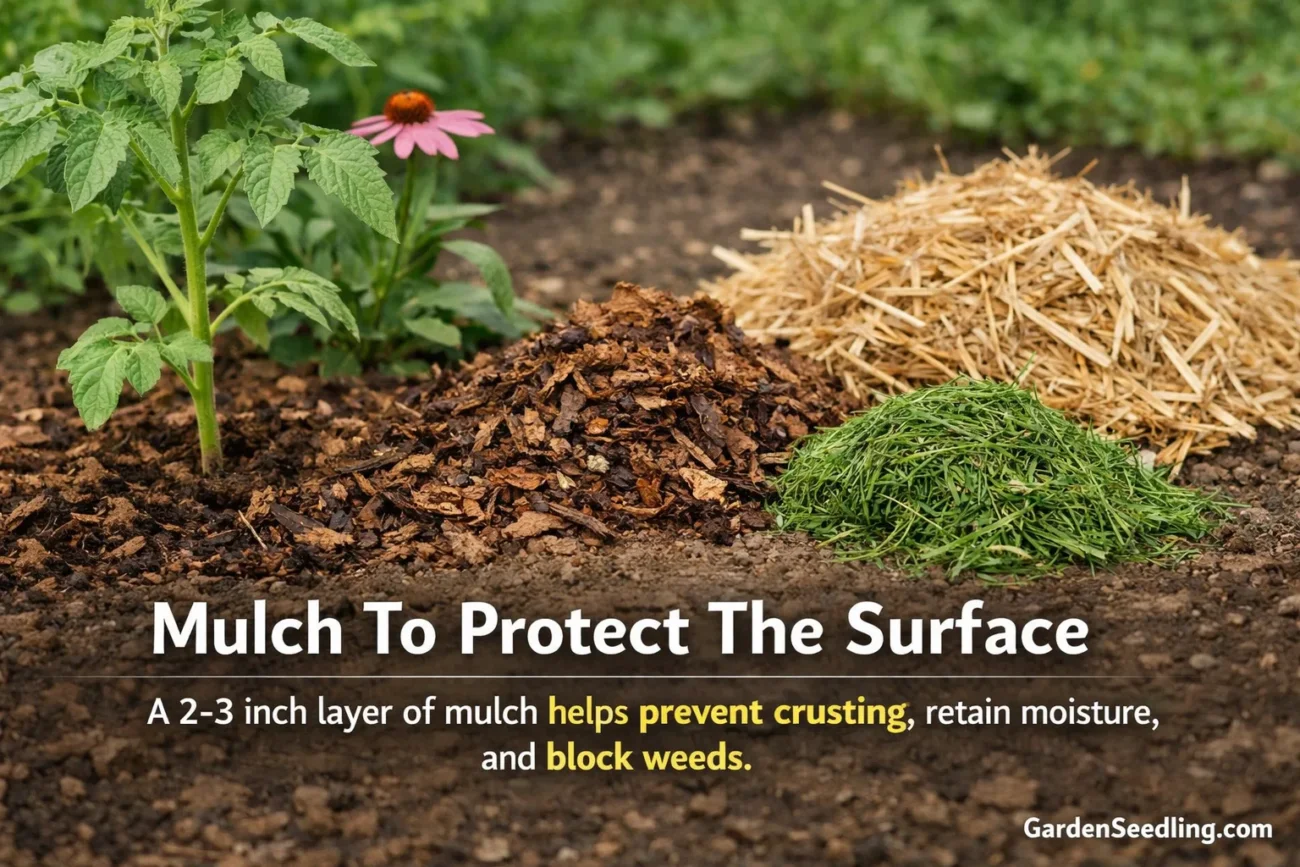
Mulch is a clay-soil superpower. A 2–3 inch layer of shredded leaves, straw, or untreated grass clippings helps prevent crusting, reduces evaporation, and limits weeds. Keep mulch a couple inches away from plant stems to reduce rot risk.
Step 10: Water Deeply And Less Often
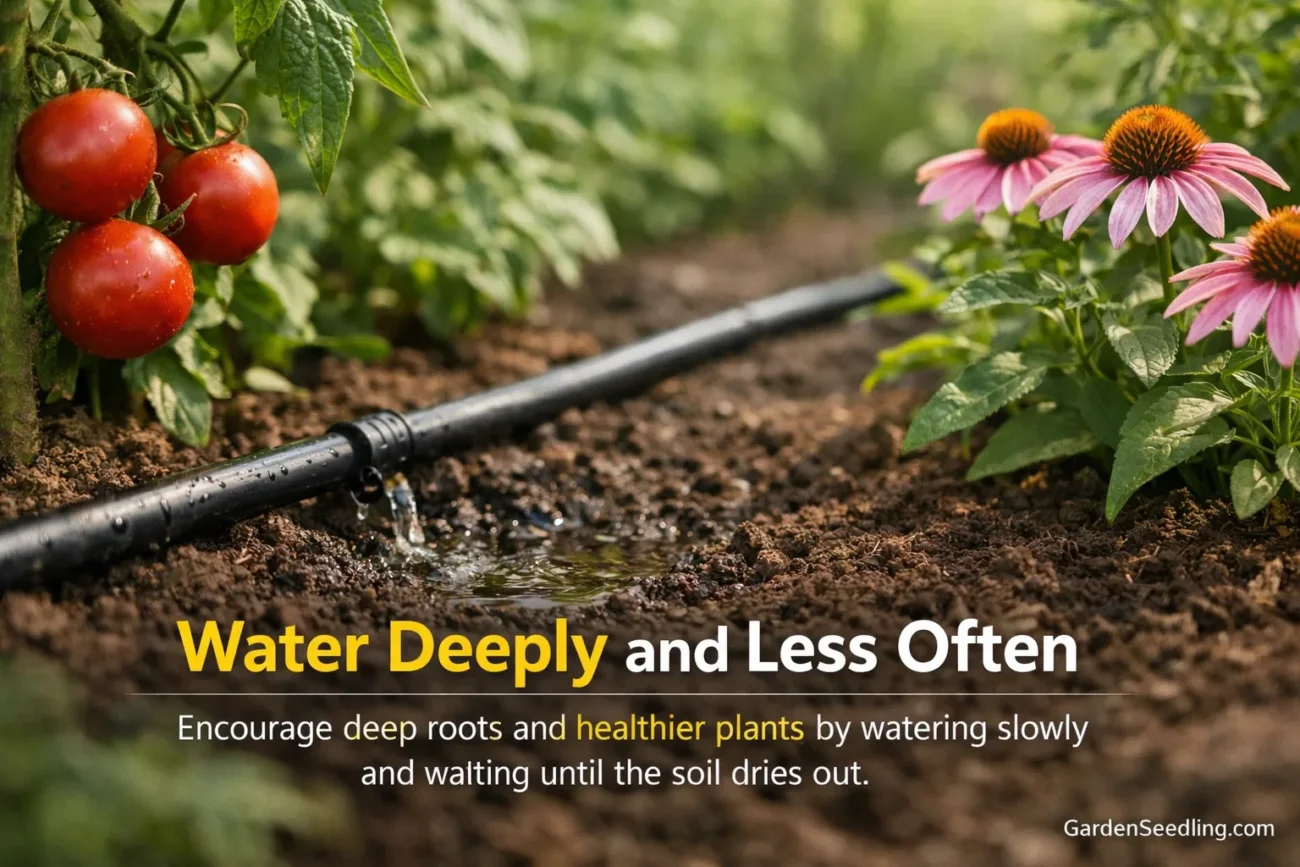
Clay holds water longer, so frequent light watering can keep roots too wet. Water slowly and deeply, then wait until the top inch or two begins to dry before watering again. Drip irrigation or soaker hoses help prevent puddling and reduce disease pressure.
Best Vegetables To Grow In Clay Soil
Once you’ve improved the top layer and shaped beds for drainage, you can grow most common vegetables. If you want the easiest wins while your soil improves, start with these:
- Brassicas: broccoli, cabbage, kale, collards (strong roots, steady growth)
- Leafy greens: Swiss chard, spinach (especially in cool seasons)
- Legumes: bush beans (avoid overly wet spots at planting)
- Squash family: zucchini, pumpkins, winter squash (benefit from mounded planting)
- Alliums: onions and garlic do best with improved drainage and looser topsoil
Root crops like carrots and parsnips can still work, but they usually need deeper loosening and consistent compost additions to avoid forked or stunted roots. If you want straight carrots sooner, consider a raised bed or a deep container filled with a fluffy mix. This is often the most reliable workaround.
Planting And Ongoing Care In Clay Soil
The start matters, but clay gardens really shine when you protect structure all season. Think “build and preserve” rather than “dig and reset.”
Watering Without Waterlogging
- Water in the morning so leaves dry faster.
- Use drip lines to apply water slowly and evenly.
- Check moisture under mulch before adding more water.
Prevent Compaction All Season
Compaction is the fastest way to undo your progress. Stay out of beds, especially after rain. Keep permanent paths and refresh path mulch as it breaks down. If your soil surface crusts after storms, a thin mulch layer and gentle surface cultivation can improve seedling emergence without heavy tilling.
Seasonal Maintenance That Improves Clay Each Year
- Fall: Add compost, apply a fresh mulch layer, and consider a cover crop (like oats or clover) to protect soil.
- Spring: Pull mulch back slightly where you’ll plant, top-dress with compost, and avoid deep digging if structure is improving.
Common Mistakes To Avoid In Clay Soil Gardens
- Working the soil when it’s wet: this creates clods and compaction that linger.
- Walking in garden beds: even a few steps can compress clay severely.
- Over-tilling: it can break structure and lead to re-compaction.
- Adding sand in small amounts: it can worsen texture instead of improving it.
- Overwatering: clay holds moisture; watering schedules should be slower and less frequent.
- Skipping mulch: bare clay crusts, cracks, and loses structure faster.
Practical Tips For Faster Success In Clay Soil
- Start with one or two beds and expand as the soil improves.
- Use mounds for plants that hate wet feet (tomatoes, peppers, many herbs).
- Top-dress with compost instead of digging deeply every season.
- Keep a simple rain gauge and adjust watering based on real rainfall.
- Use a lightweight garden fork to gently loosen, not flip, the soil when needed.
Clay soil rewards consistency. If you add organic matter, protect your beds from compaction, and manage water with intention, your garden will become easier to plant and more productive each year. Start simple, keep improving, and let the soil build over time.
FAQ
Can I Mix Sand Into Clay Soil To Improve Drainage?
It’s usually better to avoid it. Small amounts of sand can make clay denser. Use compost and organic matter to improve structure and drainage instead.
How Deep Should I Amend Clay Soil For Vegetables?
For most vegetables, improving the top 6–8 inches is a solid start. Over time, top-dressing and root growth will help deeper layers.
Do I Need Raised Beds For Clay Soil?
Not always. Raised beds help a lot if your yard drains poorly or stays wet after rain. If drainage is decent, improved in-ground beds can work well.
What Vegetables Grow Best In Clay Soil?
Brassicas (kale, cabbage), leafy greens, beans, and squash often do well once the top layer is improved and beds are slightly raised.
How Can I Tell If Clay Soil Is Too Wet To Work?
Squeeze a handful. If it forms a sticky ball or ribbon, it’s too wet. If it crumbles when poked, it’s ready.