Food scraps don’t just “disappear” after trash day. In a landfill, they break down without oxygen and push methane into the air (that’s why more neighborhoods now have green bins or food-scrap drop-offs—you’ve probably noticed). If you’d rather turn peels and leaves into something your garden actually wants, a compost pile is the simplest place to start.
- Why Compost? What You Get Out Of It
- Choosing The Right Compost System
- Space-Saver Options Under 1 m²
- The Science Without The Headache: Browns, Greens, Air, Water
- A Simple Browns-To-Greens Rule That Actually Works
- Compost Temperature: What “Hot” Means
- Typical C:N Ratios (Helpful When You’re Guessing)
- What To Add (Beginner-Friendly Materials)
- What To Avoid (Or Use With Caution)
- Step-By-Step: Building Your First Compost Pile
- Step 1: Pick The Spot
- Step 2: Build For Heat (If You Want Speed)
- Step 3: Start With A “Breathing” Base
- Step 4: Layer Browns And Greens
- Step 5: Moisture Check (The Sponge Test)
- Step 6: Turn On A Simple Schedule
- Optional: An 8-Week Temperature Log (Fill It In)
- Troubleshooting Guide: Smells, Pests, Slow Breakdown
- Fast Triage: “My Pile Isn’t Heating Up”
- Hot Compost Vs Cold Compost (So You Don’t Fight The Wrong Battle)
- Seasonal And Climate Considerations
- Cold Winters (Freezes, Snow, Long Nights)
- Hot, Dry Summers
- Humid Or Rainy Climates
- Harvesting And Using Finished Compost
- How To Tell It’s Ready
- How Much Compost To Add In Garden Beds
- Using Compost For Seed Starting
- Common Mistakes Beginners Make
- Safety And Sustainability Tips
- Quick-Start Checklist
- FAQ
- How Long Does It Take For Compost To Be Ready?
- Why Does My Compost Smell Like Ammonia?
- Do I Need A Compost Starter Or Activator?
- How Often Should I Turn A Compost Pile?
- Can I Compost During Winter?
You don’t need fancy gear. You need the right mix, enough moisture, and a little air. That’s it. And yes—your first pile might look messy. Normal.
Quick Answer: Pick a spot with drainage, build a pile that’s at least 3 ft x 3 ft x 3 ft if you want heat, layer roughly 2–3 parts “browns” to 1 part “greens”, wet it to a wrung-out-sponge feel, then turn it every 1–4 weeks depending on how fast you want results.
Why Compost? What You Get Out Of It
Compost helps soil hold water, improves crumbly structure, and feeds a whole web of life underground. Vegetables root better in that kind of soil. Flowers handle dry spells better too. It’s a soil upgrade, not “free fertilizer.”
There’s also the waste side of it. Food waste makes up about a quarter of what gets landfilled, and it’s tied to a big share of landfill methane emissions. Composting at home won’t fix everything, but it’s one of those actions that stays practical year after year.
Choosing The Right Compost System
Start by matching the system to your space and how much “hands-on” you can tolerate. If you pick something you hate using, you’ll stop. Simple.
| System | Best For | Space | Typical Cost | Speed | What To Know |
|---|---|---|---|---|---|
| Open Pile | Yards with leaves/yard waste | Medium–Large | $0 | Medium | Fast to build; needs a bit more “tidy tolerance.” |
| Simple Bin | Neater look, easier turning | Small–Medium | $50–$150 | Medium | Holds heat better; check access for turning. |
| Tumbler | Urban yards, pest concerns | Small | $100–$250 | Medium–Fast | Easy mixing; can run dry, and some don’t heat well in winter. |
| Worm Bin (Vermicompost) | Indoors/garage, steady kitchen scraps | Very Small | $50–$200 | Fast (for scraps) | No heat; excellent for seed-starting mixes when finished. |
| Bokashi Bucket | Apartments, minimal smell | Very Small | $40–$150 | Fast (ferment) | Ferments scraps first; you still bury/finish it in soil or a bin. |
Space-Saver Options Under 1 m²
If you have a balcony, patio, or basically “one corner,” you still have options. Go for contained systems that control moisture and critters.
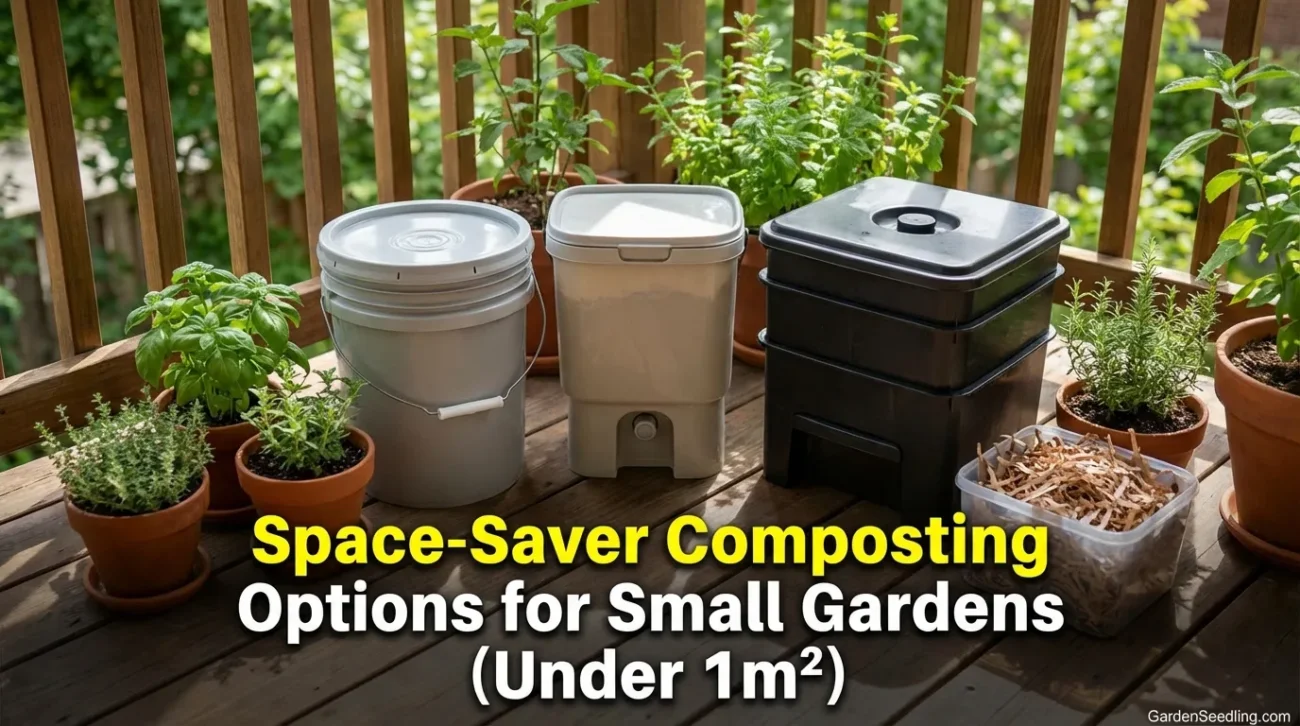
- 10–20 L kitchen scrap bucket (tight lid): collect greens, sprinkle browns (shredded paper/leaves), empty every few days into a community bin, trench, or outdoor pile.
- Bokashi: great if you cook a lot and don’t want fruit flies hovering around your counter.
- Worm bin: best when you produce steady, predictable scraps (and you can keep it above freezing).
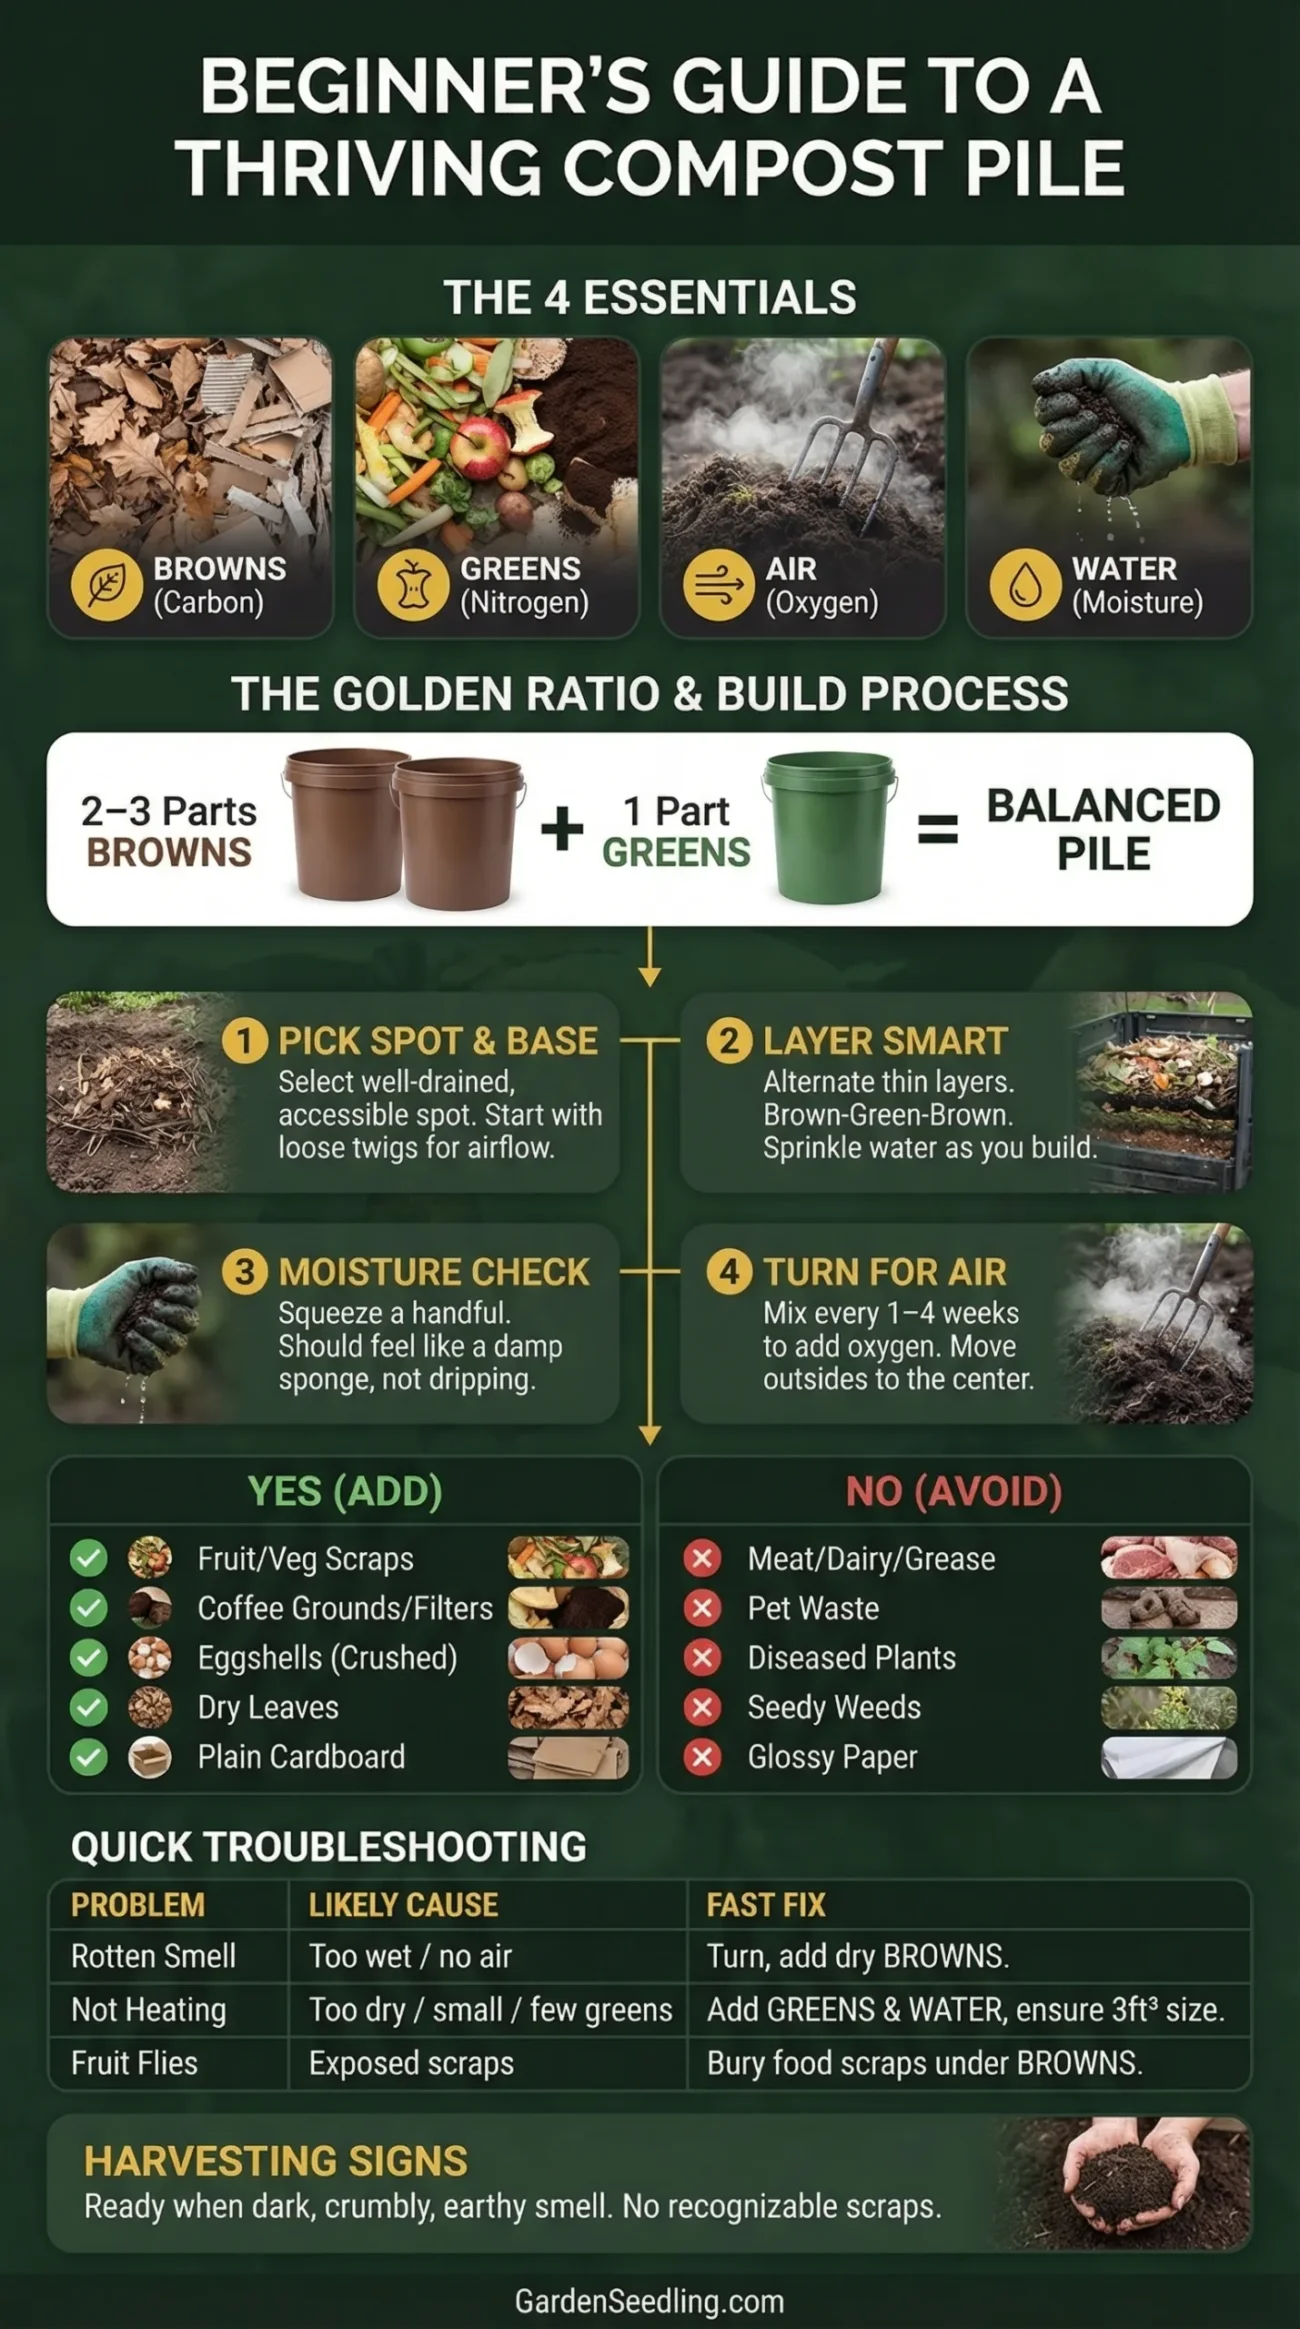
The Science Without The Headache: Browns, Greens, Air, Water
Compost works because microbes eat carbon and nitrogen while you give them water and oxygen. Carbon comes from “browns” like dry leaves and paper. Nitrogen comes from “greens” like food scraps and fresh plant trimmings. Balance matters.
You’ll see the carbon-to-nitrogen ratio written as C:N. For active composting, a target around 25–30:1 works well. Don’t stress about doing math every time; you can use a simple volume rule and adjust by smell and temperature.
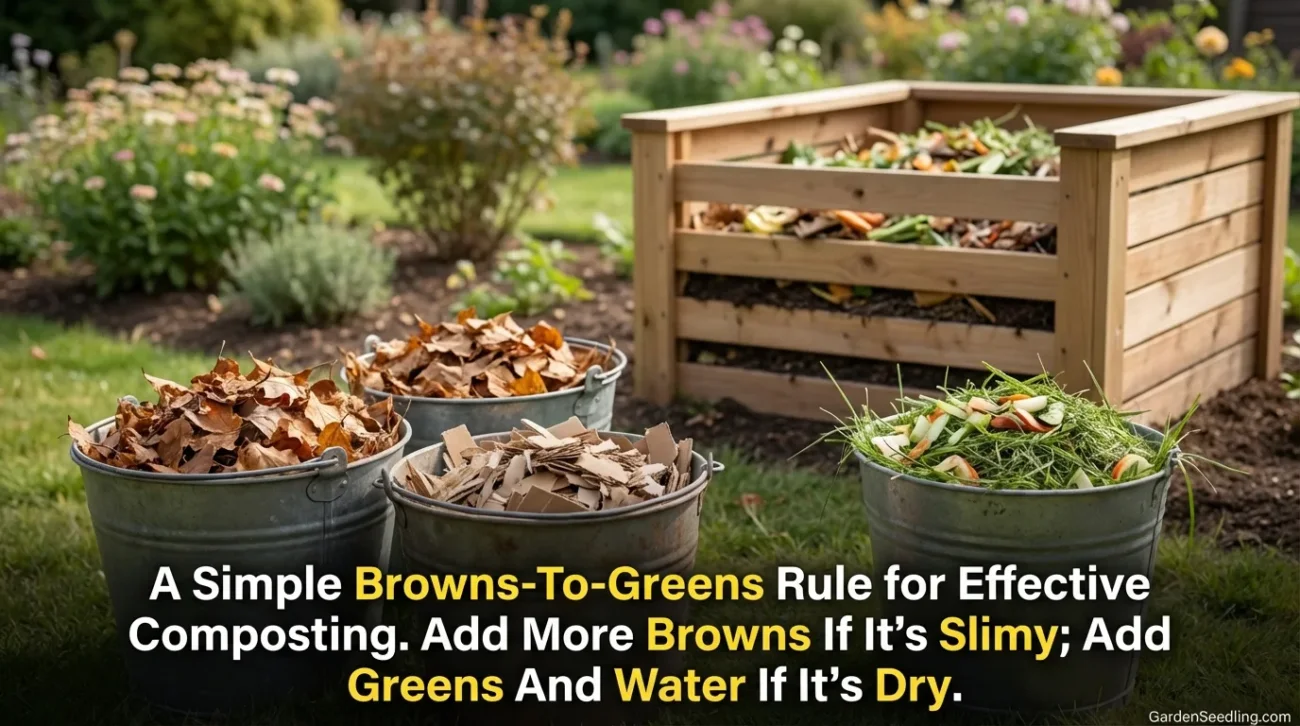
A Simple Browns-To-Greens Rule That Actually Works
Start with 2–3 buckets of browns for every 1 bucket of greens. If your pile turns slimy or stinky, add more browns. If it sits there like a dry leaf pile, add greens and water. Easy.
Compost Temperature: What “Hot” Means
If you want a hot pile (the faster method), size and oxygen matter. When microbes really get going, the core often sits in the 130–150°F range. That heat helps break things down faster, and it also helps reduce many weed seeds and pathogens when managed well.
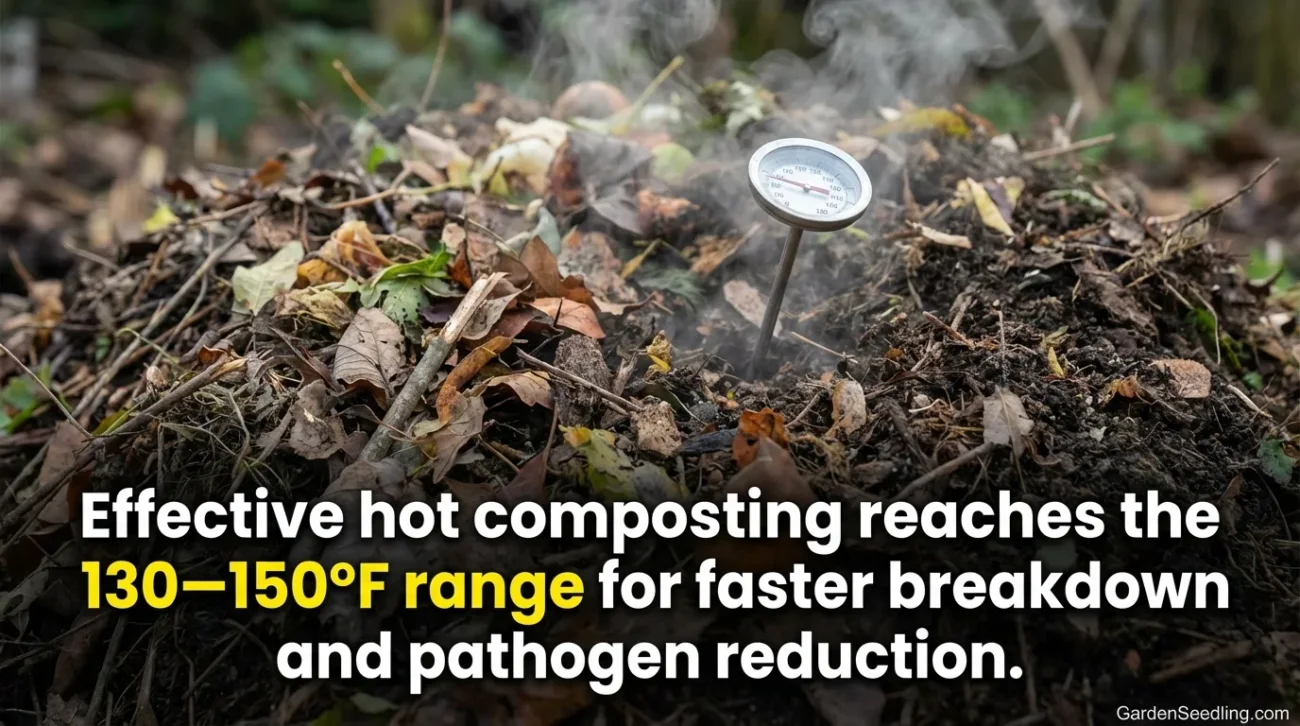
One practical trick: use a compost thermometer if you like data. If you don’t, use your hand. Warm center + earthy smell usually means you’re on track.
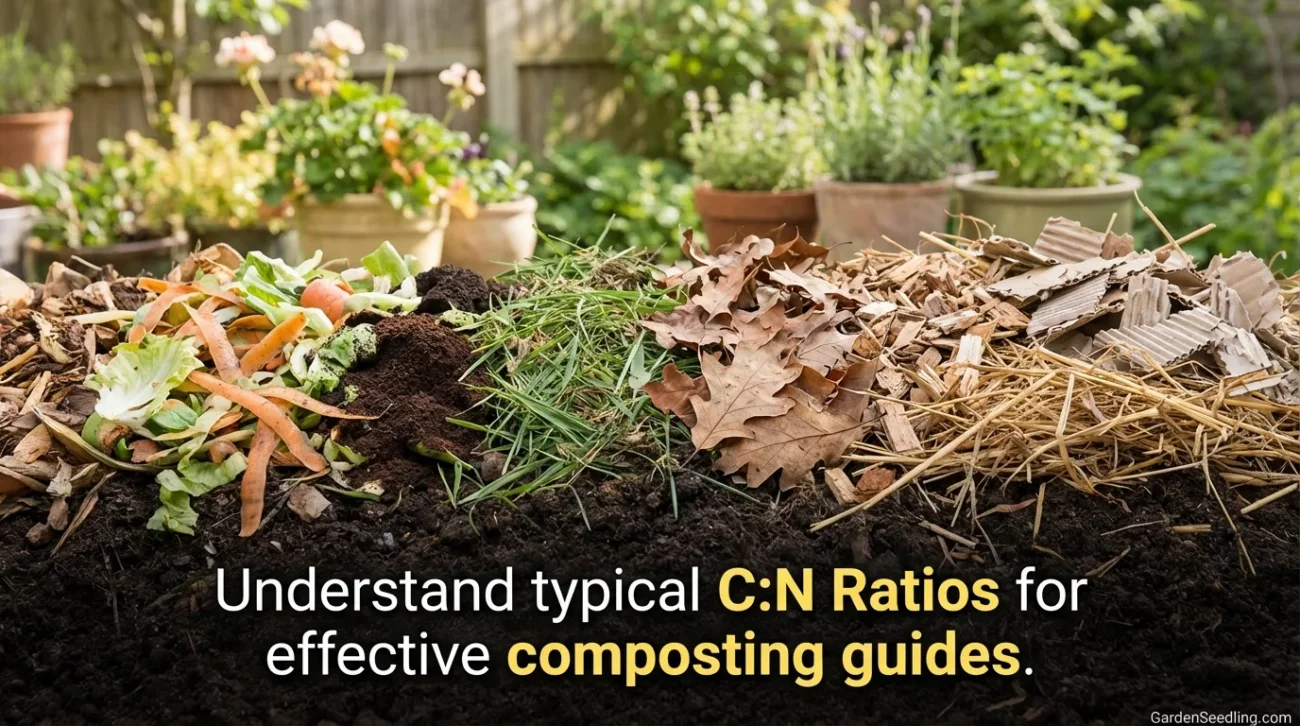
Typical C:N Ratios (Helpful When You’re Guessing)
These are common ballpark numbers. They vary by source material, season, and moisture, so treat them like guides, not laws.
| Material | Type | Typical C:N Range | Practical Note |
|---|---|---|---|
| Vegetable scraps | Green | 15–20:1 | Bury them to avoid smells/flies. |
| Coffee grounds | Green-ish | ~20:1 | Great nitrogen; mix with browns so it doesn’t clump. |
| Grass clippings | Green | 15–25:1 | Add thin layers; thick mats go anaerobic fast. |
| Dry leaves | Brown | 30–80:1 | Shred for speed. Leaves alone compost slowly. |
| Straw | Brown | 40–100:1 | Good structure; helps airflow. |
| Wood chips | Brown | 100–500:1 | Use sparingly in a fast pile; better as a “structure” layer. |
| Cardboard (corrugated) | Brown | Very high (hundreds:1) | Shred and dampen; it loves to stay dry. |
What To Add (Beginner-Friendly Materials)
Keep your ingredient list boring at first. Boring piles compost better. Reliable inputs beat random experiments.
- Fruit and veggie scraps (chop big pieces)
- Coffee grounds and paper filters
- Tea leaves (skip plastic “silk” bags)
- Eggshells (crush them; they break down slowly)
- Dry leaves (shredded if possible)
- Shredded plain cardboard/paper (no glossy coatings)
- Garden trimmings (disease-free)
- Small amounts of untreated sawdust/wood shavings mixed well
What To Avoid (Or Use With Caution)
A beginner pile stays cleaner when you avoid stuff that causes odor, pests, or contamination. Skip the drama materials.
- Meat, fish, dairy, grease, oils (high odor + pest magnets)
- Pet waste (pathogen risk; don’t use in food gardens)
- Diseased plants (unless you run a reliably hot pile and know what you’re doing)
- Weeds with mature seeds (hot compost can handle some, but don’t start here)
- Glossy paper, coated packaging, “compostable” plastics unless your local facility confirms acceptance
- Grass clippings, straw, or manure from unknown herbicide use (some herbicides can persist and harm garden plants)
If you’re unsure about lawn chemicals or hay/straw treatments, play it safe. One bad batch can mess up seedlings for weeks.
Step-By-Step: Building Your First Compost Pile
This is the backyard pile method (open pile or bin). If you’re using a tumbler, the ingredient balance stays the same—you’ll just “turn” by spinning.
Step 1: Pick The Spot
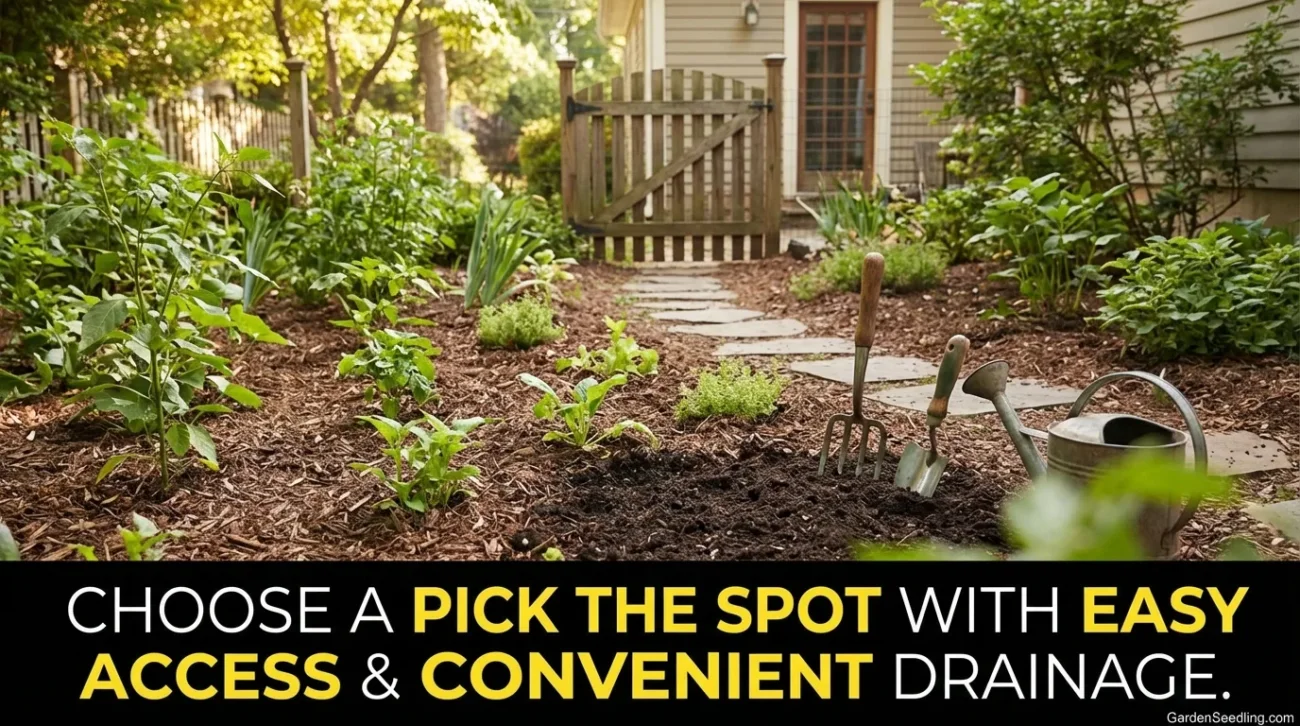
Choose a place with drainage and easy access. You’ll visit it a lot at the start. Convenient beats perfect.
- Contact with soil helps microbes move in fast.
- Partial shade can slow drying in summer (nice bonus).
- Keep it a short walk from the kitchen door if possible.
Step 2: Build For Heat (If You Want Speed)
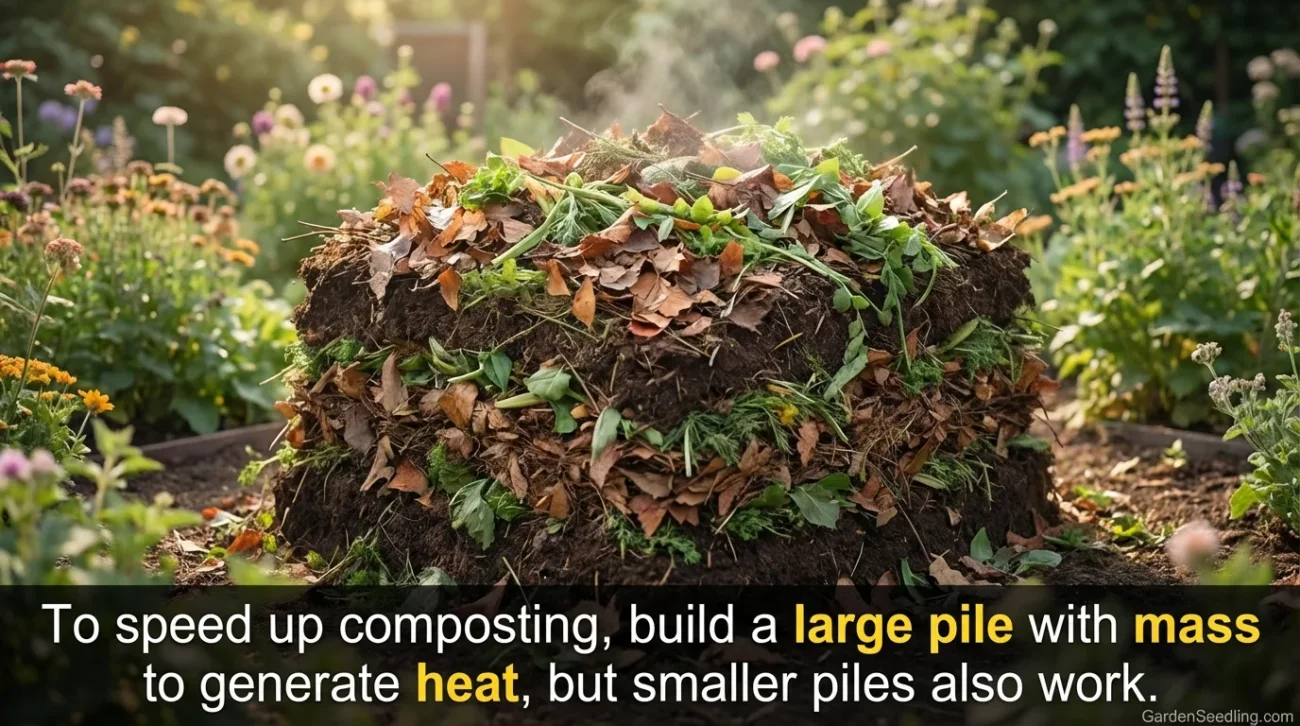
A hot pile needs mass. Aim for at least 3 ft x 3 ft x 3 ft. Smaller piles still compost, just slower—and they often won’t heat much. That’s okay. It’s still composting.
Step 3: Start With A “Breathing” Base
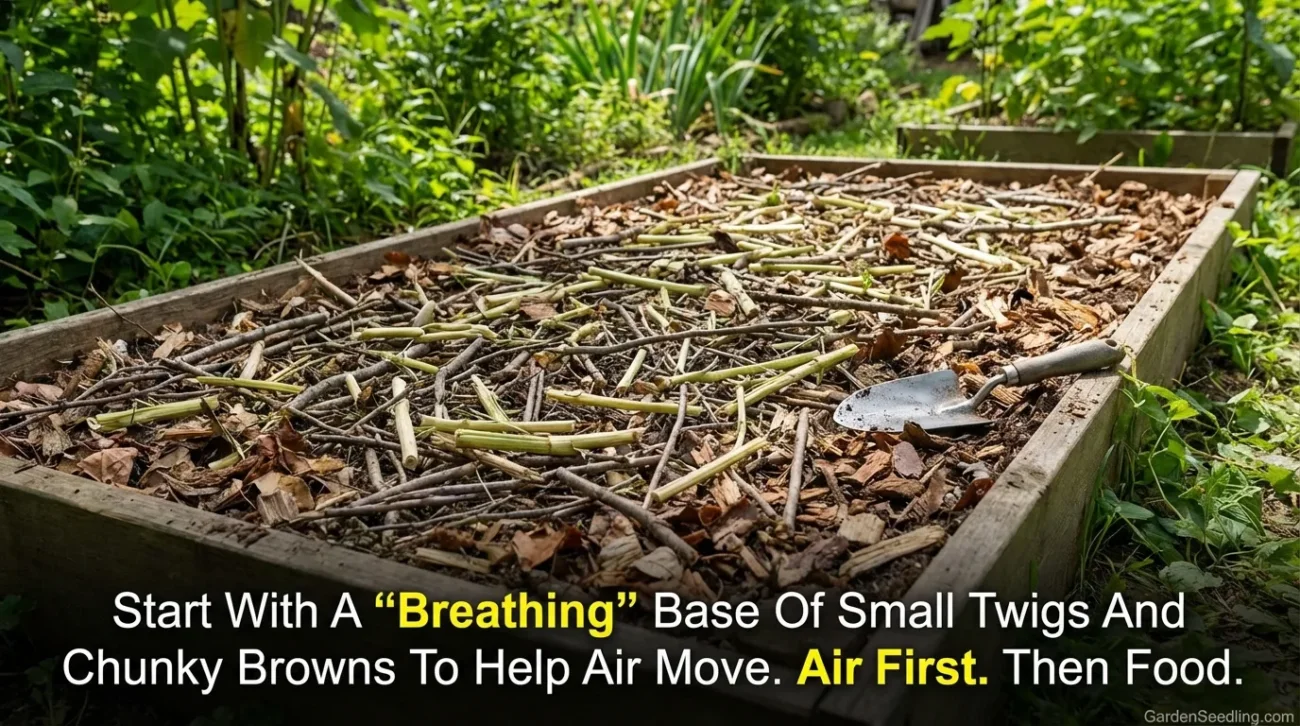
Put down a loose layer of small twigs, sunflower stalks, or chunky browns. This helps air move up from the bottom. Air first. Then food.
Step 4: Layer Browns And Greens
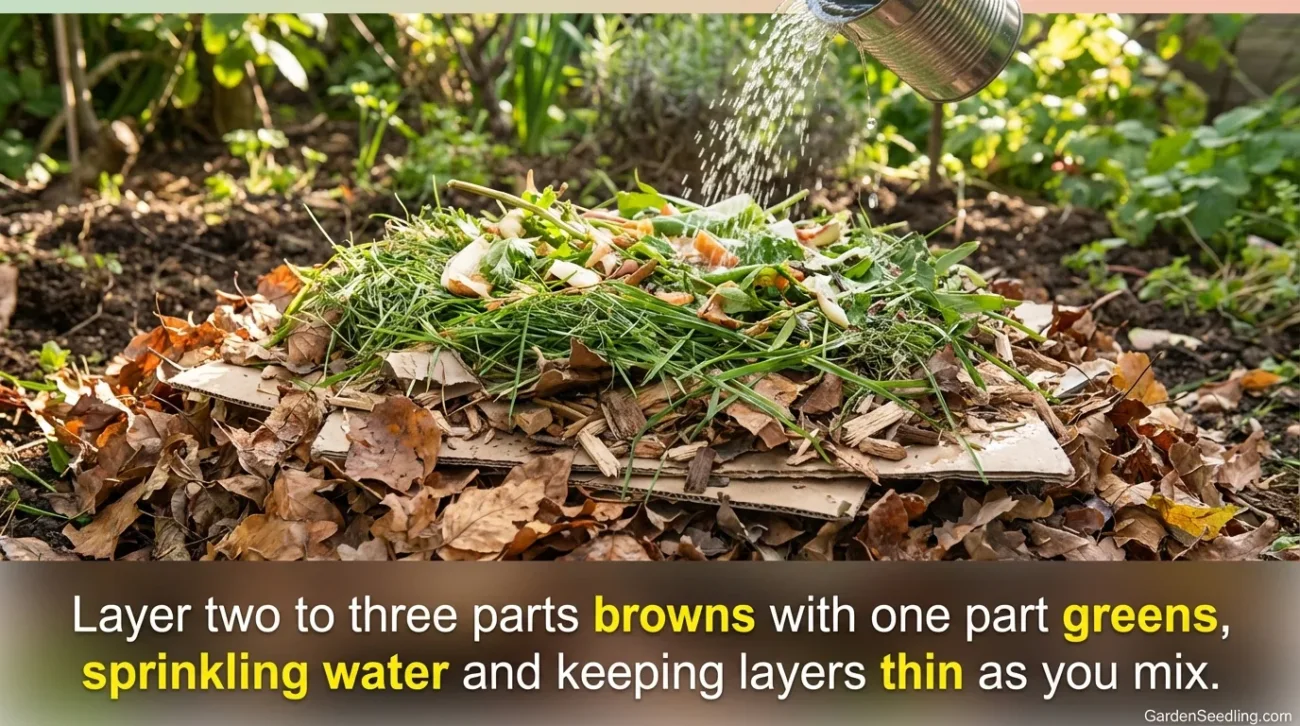
Use a simple rhythm:
- 2–3 parts browns
- 1 part greens
- Sprinkle water as you build
Keep layers thin. Thick grass mats or a giant pile of wet kitchen scraps can turn anaerobic fast (that sour smell tells you). Mix as you go.
Step 5: Moisture Check (The Sponge Test)
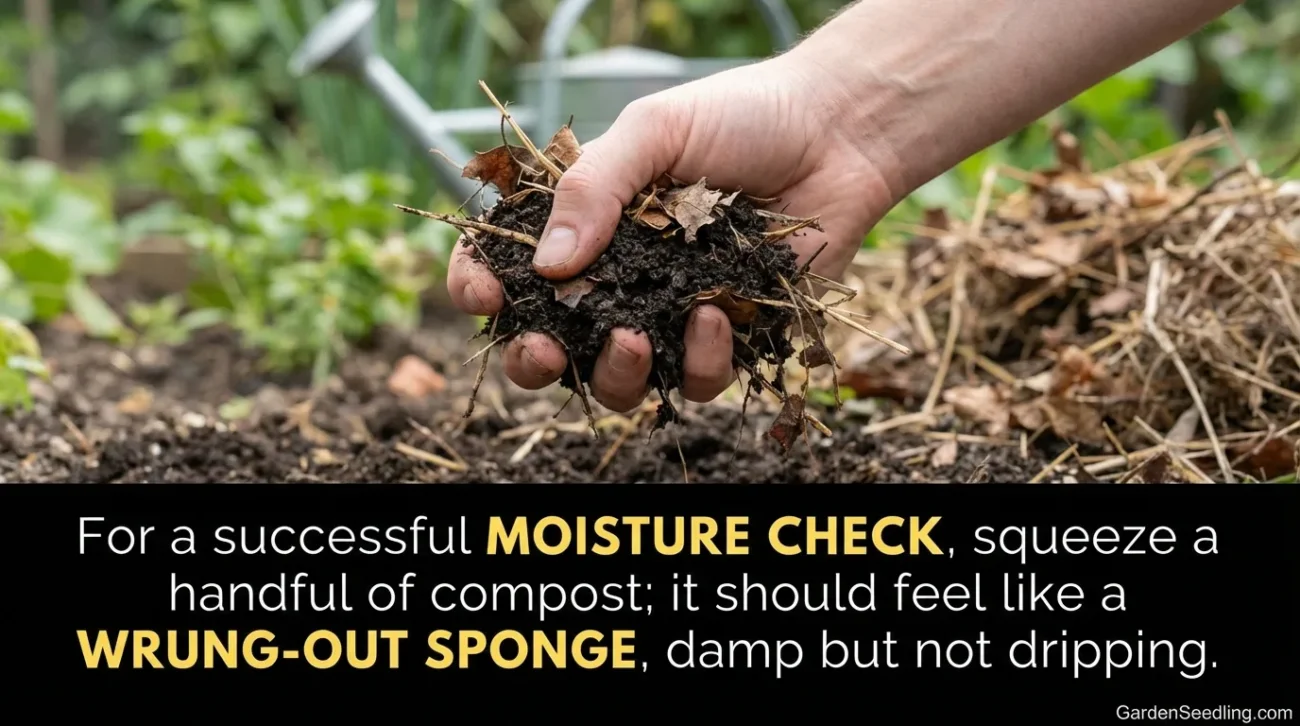
Grab a handful from the middle and squeeze. It should feel like a wrung-out sponge: damp, but not dripping. If it’s dry, water it. If water runs out, add dry browns and turn.
Step 6: Turn On A Simple Schedule
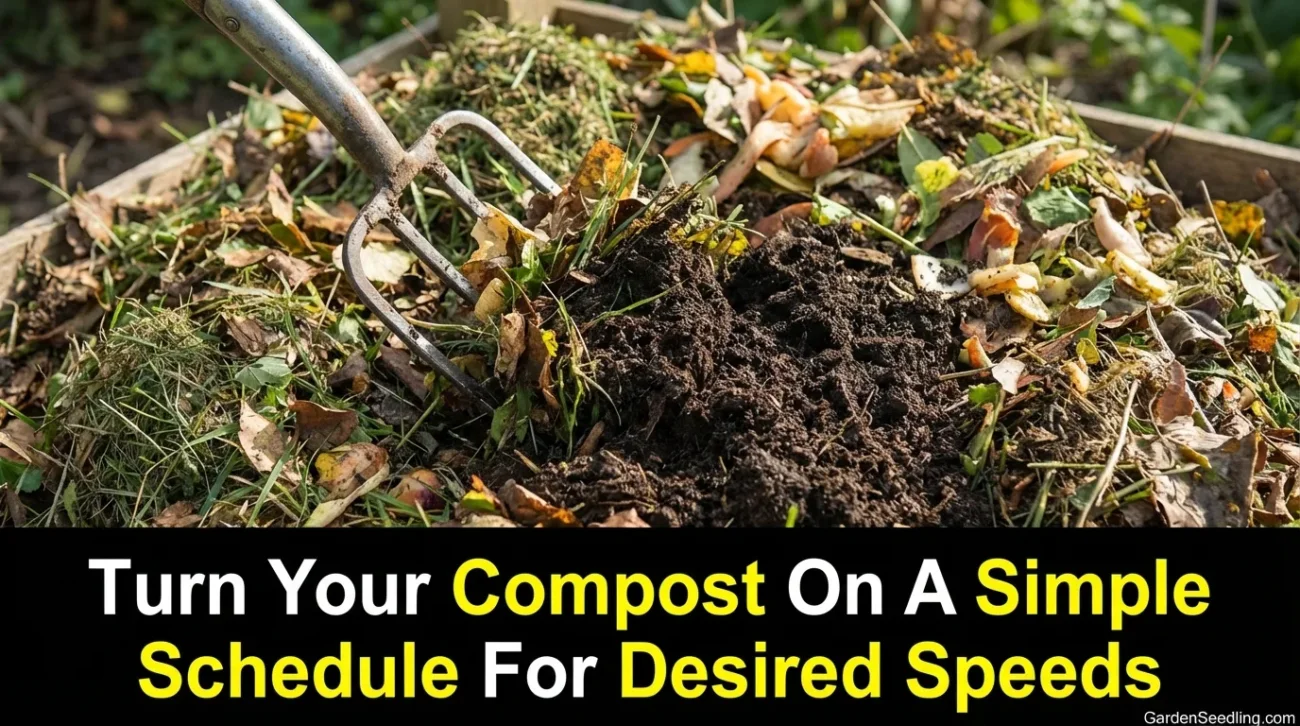
If you want faster compost, turn more often. If you want “set it and forget it,” turn less. Either works, just at different speeds.
- Fast-ish pace: turn every 7–14 days once it heats up.
- Low-effort pace: turn every 3–5 weeks.
When you turn, move outside material into the center. That’s where the heat lives. Center first.
Optional: An 8-Week Temperature Log (Fill It In)
If you like tracking progress (and catching problems early), use a simple log. Even a cheap thermometer works.
| Week | Date | Core Temp (°F) | Smell (Earthy/Sour/Ammonia) | Moisture (Dry/Good/Wet) | Action Taken |
|---|---|---|---|---|---|
| 1 | |||||
| 2 | |||||
| 3 | |||||
| 4 | |||||
| 5 | |||||
| 6 | |||||
| 7 | |||||
| 8 |
Good target zone: Many active piles run roughly 130–150°F in the core when conditions line up. Below that can still compost—it just slows down.
Troubleshooting Guide: Smells, Pests, Slow Breakdown
Most compost problems come from one thing: not enough oxygen, not enough carbon, or too much water. The fix usually feels almost too simple. Add browns, add air, or both.
| Problem | Likely Cause | Fast Fix |
|---|---|---|
| Rotten/“sewage” smell | Too wet + not enough air (anaerobic pockets) | Turn the pile, add dry browns (leaves/cardboard), rebuild in looser layers. |
| Ammonia smell | Too much nitrogen (too many greens) | Add plenty of browns, mix well, avoid dumping big batches of grass at once. |
| Fruit flies | Scraps exposed near the top | Bury kitchen scraps in the center; cap the top with 2–4 inches of browns. |
| Rats/raccoons | Attractants (meat/dairy/grease) or easy access | Remove attractants, use a lidded bin, add a wire base if needed, keep scraps buried. |
| Pile won’t heat | Too small, too dry, too many browns, not enough greens | Increase pile size, wet it evenly, add greens, and turn once to blend. |
| Matting grass layers | Thick clumps block airflow | Break up clumps; mix grass with shredded leaves or cardboard. |
| Lots of ants | Pile is dry | Water lightly while turning; aim for sponge-damp. |
Fast Triage: “My Pile Isn’t Heating Up”
Check these in order (don’t jump around):
- Size: If you want heat, build at least 3 ft cubed. Smaller piles struggle.
- Moisture: Dry materials won’t “cook.” Add water as you turn.
- Mix: If it’s mostly leaves/cardboard, add greens (food scraps, coffee grounds, a thin layer of grass).
- Oxygen: Turn it, then wait at least two weeks before turning again so the center can warm up.
Sometimes the honest answer is: it’s winter, and your pile is small. So it chills. Literally.
Hot Compost Vs Cold Compost (So You Don’t Fight The Wrong Battle)
Both methods make good compost. The difference is how much you manage the pile.
| Method | What You Do | Typical Timeline | Trade-Off |
|---|---|---|---|
| Hot Compost | Balance inputs, keep moisture right, turn more often | Often a few months (sometimes faster) | More work, less waiting. |
| Cold Compost | Build a pile, add materials over time, turn rarely | Often 6–24 months | Less work, slower breakdown. |
Seasonal And Climate Considerations
Compost is local. Weather changes what “normal” looks like, so adjust without overthinking it.
Cold Winters (Freezes, Snow, Long Nights)
- Go bigger: a larger pile holds heat better than a small bin.
- Insulate: straw bales, extra leaf bags, or a thick cardboard “jacket” around the bin helps.
- Don’t obsess over turning: turning can dump heat fast. Turn only when needed.
- Indoor plan B: worm bin or bokashi keeps scraps moving when outdoor compost slows.
Hot, Dry Summers
- Water matters: dry piles stall. Wet as you add browns, not just on top.
- Shade helps: partial shade reduces drying (especially for open piles).
- Cap the pile: a thick brown layer on top cuts odor and moisture loss.
Humid Or Rainy Climates
- More structure: add twigs, straw, or woodier browns to keep air pockets open.
- Cover the top: a lid, tarp, or a simple sheet of cardboard reduces waterlogging.
- Turn sooner if the pile smells sour.
Harvesting And Using Finished Compost
Finished compost looks dark and crumbly and smells earthy. You shouldn’t recognize yesterday’s salad. A few eggshell bits or wood chips can remain—no big deal.
How To Tell It’s Ready
- Smell: earthy, not sour or ammonia-like
- Texture: crumbly, soil-like
- Temperature: close to outdoor air temp, even after turning
If it still heats up hard after turning, let it cure longer. Patience pays when you’re using it around seedlings.
How Much Compost To Add In Garden Beds
A common beginner mistake is dumping compost like it’s potting soil. Use it as an amendment or mulch.
- New vegetable beds: spread about 3–4 inches and mix into the top 8–12 inches of soil.
- Existing beds (yearly): spread about 1/4 to 1 inch as a topdress, then lightly work it in or let worms do the job.
Using Compost For Seed Starting
For seedlings, use compost that’s fully finished and screened (no chunky bits). Mix it with other ingredients (like coconut coir or peat and perlite) so it stays light. Too much compost can hold water for too long in small cells.
Common Mistakes Beginners Make
- Too many greens at once: especially grass clippings. They mat. They stink. Spread thin layers.
- Not enough browns: if you only add food scraps, you’ll fight odor and flies.
- Letting it dry out: a dry pile doesn’t “fail,” it just pauses.
- Turning nonstop: turning every day cools the pile and wastes effort.
- Adding questionable inputs: treated lawn clippings or unknown straw/manure can cause plant damage later.
One more (and it’s a classic): people expect compost to look perfect in week two. It won’t. Let it work.
Safety And Sustainability Tips
Compost is generally safe to handle, but treat it like soil: wear gloves if you prefer, wash hands after, and avoid breathing dust when you turn a dry pile. Basic hygiene goes a long way.
- Skip pet waste for any compost you’ll use around edibles.
- Use care with “hot” piles: if your thermometer shows very high temps, turn to prevent overheating and to keep microbes active.
- Keep sharp stuff out: twist ties, stickers, bits of plastic. They show up later when you spread compost. Annoying.
- Tetanus reminder: if you garden often and your tetanus booster isn’t current, consider checking with your healthcare provider. It’s a small thing people forget.
Quick-Start Checklist
- Pick a spot with drainage and easy access.
- Build big enough (aim for 3 ft cubed if you want heat).
- Mix 2–3:1 browns to greens, then wet to sponge-damp.
- Cap with browns to reduce odor and flies.
- Turn on a schedule that matches your patience (every 1–4 weeks).
FAQ
How Long Does It Take For Compost To Be Ready?
With a managed, warm pile, compost often finishes in a few months. With a hands-off pile, it can take 6–24 months depending on weather and materials.
Why Does My Compost Smell Like Ammonia?
You likely have too many greens (extra nitrogen). Add dry browns, mix well, and avoid thick layers of grass clippings.
Do I Need A Compost Starter Or Activator?
Usually no. If your pile has browns, greens, moisture, and air, microbes show up on their own. A small scoop of finished compost can help, but it’s optional.
How Often Should I Turn A Compost Pile?
Turn every 1–2 weeks for faster results, or every 3–5 weeks for a lower-effort pace. Always bring outer material into the center when you turn.
Can I Compost During Winter?
Yes, but many piles slow down in freezing weather. Keep adding materials, use more browns to prevent sogginess, and insulate the pile if you want more activity.
If you start small, keep browns nearby, and fix problems early (smell and moisture give you clues fast), composting becomes almost automatic. And once you pull your first dark, earthy batch from the bottom of the pile… you’ll get why gardeners keep doing it.