A clean, sharp pair of garden pruners can change how pruning feels. Instead of crushing stems, tearing bark, or leaving ragged cuts that dry out slowly, sharp pruners make a neat slice and let the plant seal the wound more easily. The good news: you do not need a workshop. You can clean and sharpen garden pruners at home with a rag, a brush, rubbing alcohol, a small file or sharpening stone, and a few minutes of steady work.
- Quick Answer
- What You Need Before You Start
- Clean the Pruners Before Sharpening
- Step 1: Remove Loose Dirt and Plant Debris
- Step 2: Wipe Away Sap
- Step 3: Remove Light Rust
- Disinfect the Blades the Right Way
- How to Sharpen Garden Pruners at Home
- Step 1: Find the Beveled Edge
- Step 2: Hold the File at the Existing Angle
- Step 3: Use Short, Even Strokes
- Step 4: Remove the Burr
- Step 5: Test the Cut
- Adjust the Pivot and Spring
- Oil the Blade and Store It Dry
- How Often Should You Clean and Sharpen Pruners?
- Common Mistakes That Damage Pruners
- Sharpening Both Sides Like a Kitchen Knife
- Using Pruners on Branches That Are Too Thick
- Leaving Sap on the Blade
- Putting Tools Away Wet
- Skipping Disinfection After Diseased Plants
- Bypass vs. Anvil Pruners: Does Sharpening Change?
- Practical Tips for Cleaner Cuts
- When Cleaning and Sharpening Are Not Enough
- FAQ
- Can You Use WD-40 to Clean Garden Pruners?
- Should You Sharpen Pruners Before or After Cleaning?
- What Is the Best Disinfectant for Pruning Shears?
- How Do You Know When Pruners Are Sharp Enough?
- Can You Sharpen Cheap Garden Pruners?
- Do You Need to Take Pruners Apart to Clean Them?
This routine works for most bypass pruners, anvil pruners, hand shears, and small garden snips. It is especially useful before pruning tomatoes, roses, fruit trees, shrubs, houseplants, herbs, or seedlings. Dirty blades can carry sap, soil, rust, and sometimes plant disease from one plant to another. Dull blades cause their own trouble. They squeeze before they cut.
Quick Answer
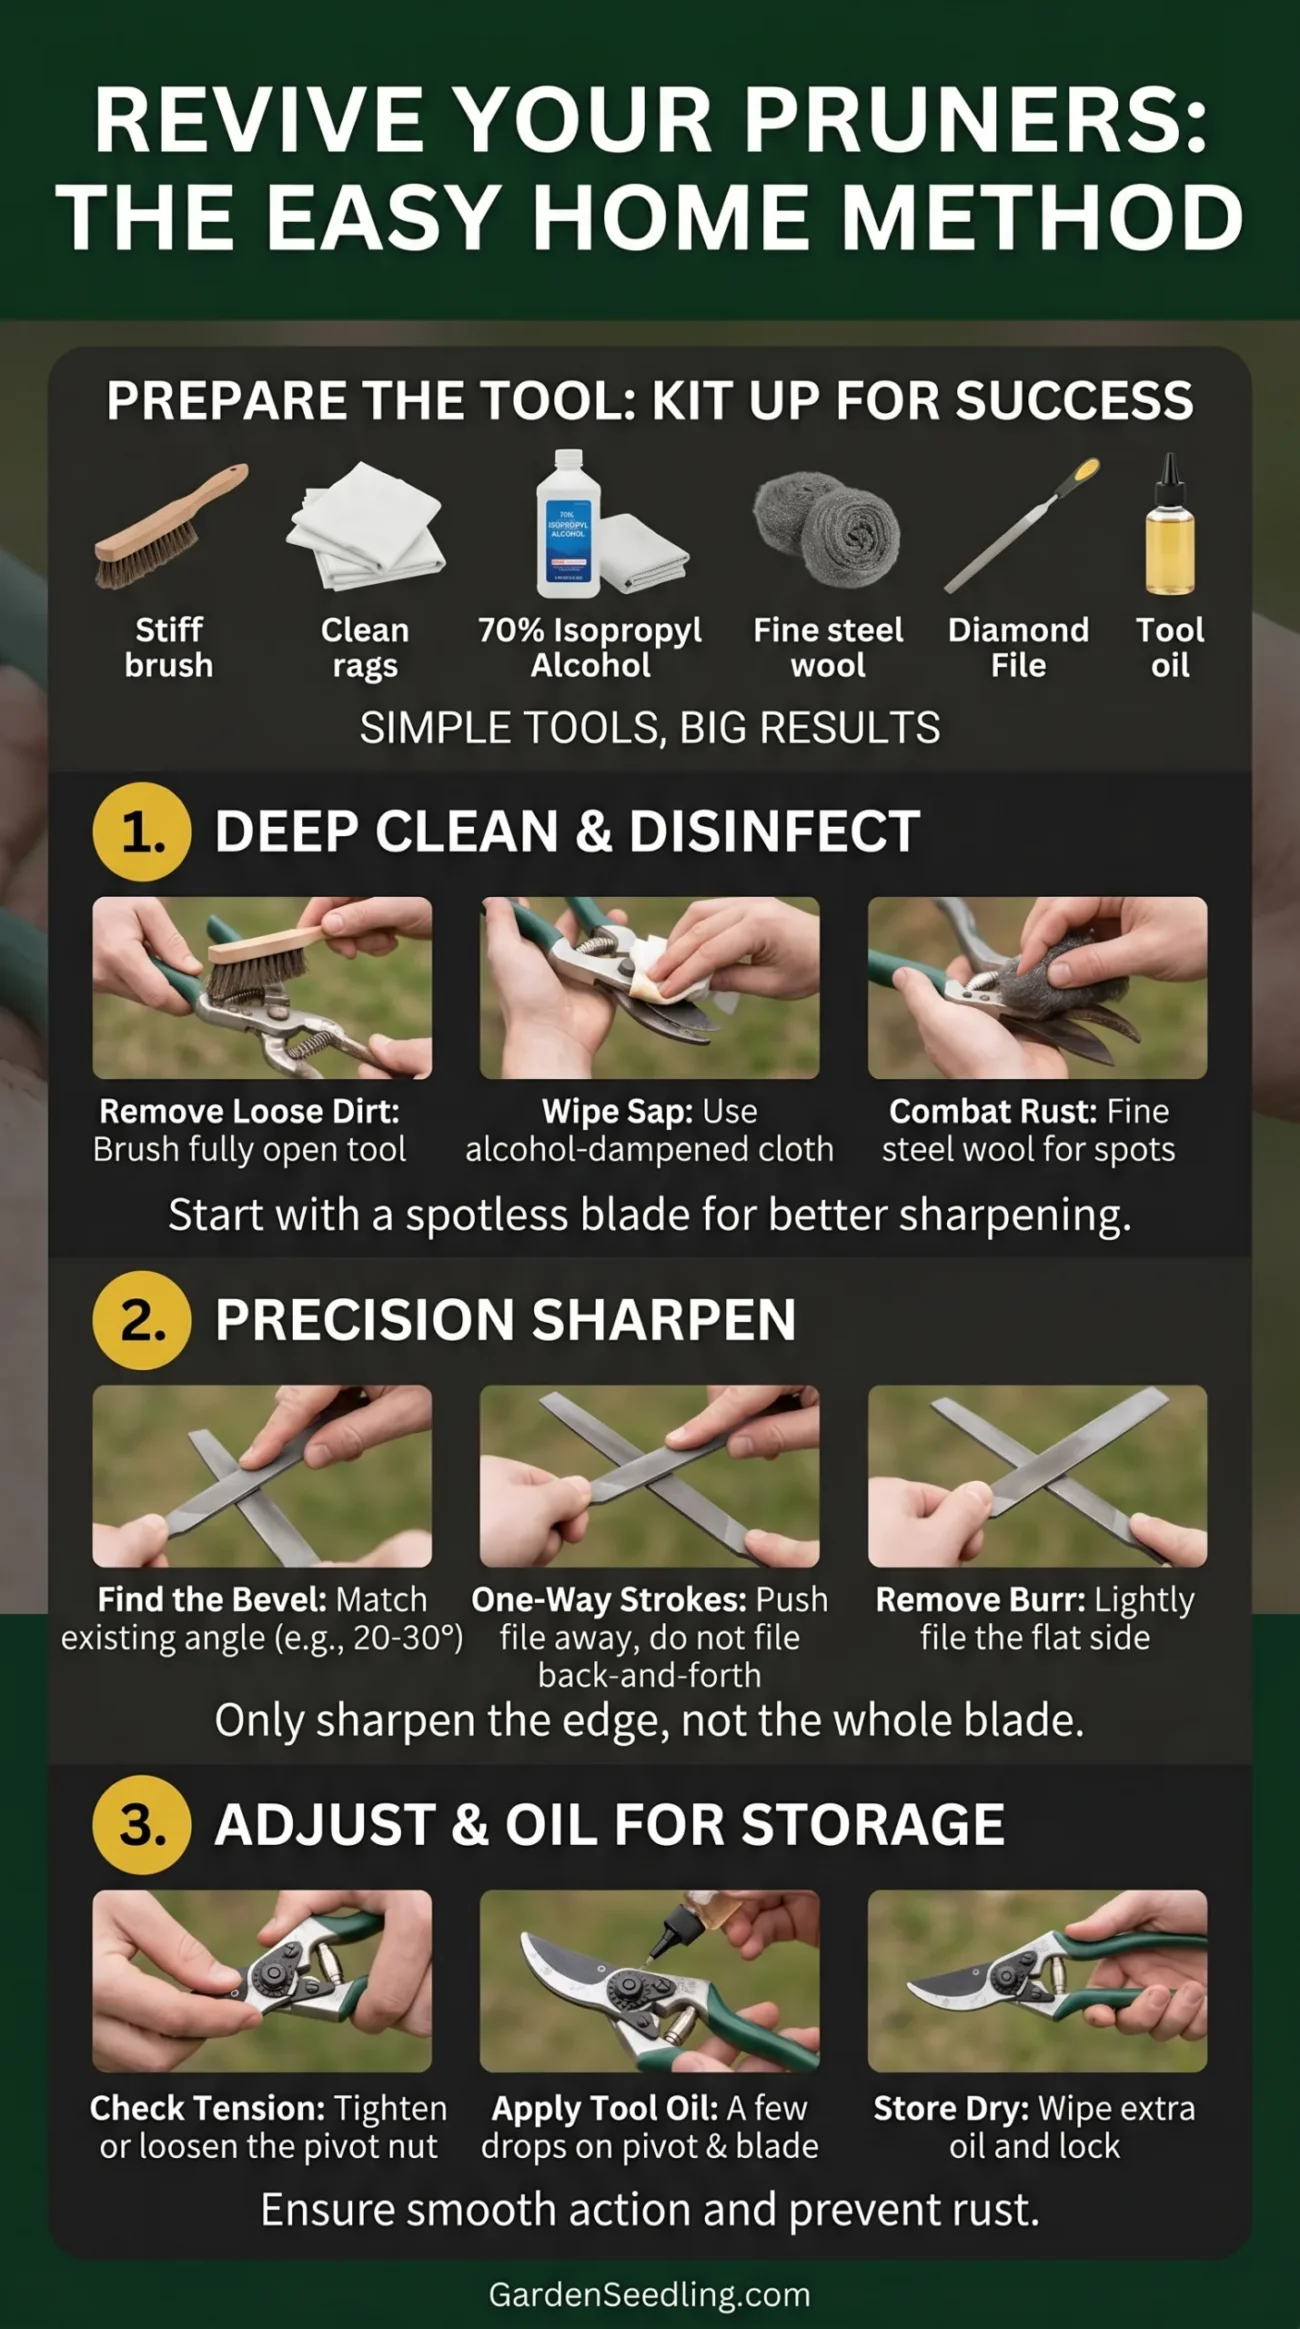
To clean and sharpen garden pruners at home, first brush away soil and plant bits, wipe off sticky sap, disinfect the blades with 70% isopropyl alcohol, dry everything well, sharpen only the beveled cutting edge with a diamond file or sharpening stone, remove the burr with a light pass on the flat side, then oil the pivot and blade. For regular garden use, clean pruners after each pruning session and sharpen them whenever they crush stems instead of cutting cleanly.

What You Need Before You Start
Keep the setup simple. Fancy tools are not required, and that is part of the appeal. A small kit stored near your potting bench or garage shelf makes the job easier to repeat.
- Stiff brush: An old toothbrush, nail brush, or small wire brush works for dirt in the hinge area.
- Clean rags: Use one for cleaning and one dry rag for the final wipe.
- 70% isopropyl alcohol: Good for disinfecting blades between plants and after pruning diseased growth.
- Mild dish soap: Useful for dirty handles and caked-on grime.
- Steel wool or fine sandpaper: Helpful for light rust, not heavy damage.
- Diamond file, sharpening file, or whetstone: A small flat file gives the most control on pruner blades.
- Tool oil or mineral oil: Use a small amount on the blade and pivot after cleaning.
- Gloves: Not required, but smart. Sharp blades are quiet troublemakers.
If the pruners have a removable pivot nut, you may also want a small wrench or screwdriver. Do not take them apart the first time unless you feel comfortable putting the spring, washer, lock, and nut back in the same order. A phone photo before disassembly helps more than people expect.
Clean the Pruners Before Sharpening
Sharpening dirty pruners is like trying to polish a muddy window. You cannot see the edge clearly, and sap can clog the file. Start with cleaning, even if the blades only look “a little sticky.”
Step 1: Remove Loose Dirt and Plant Debris
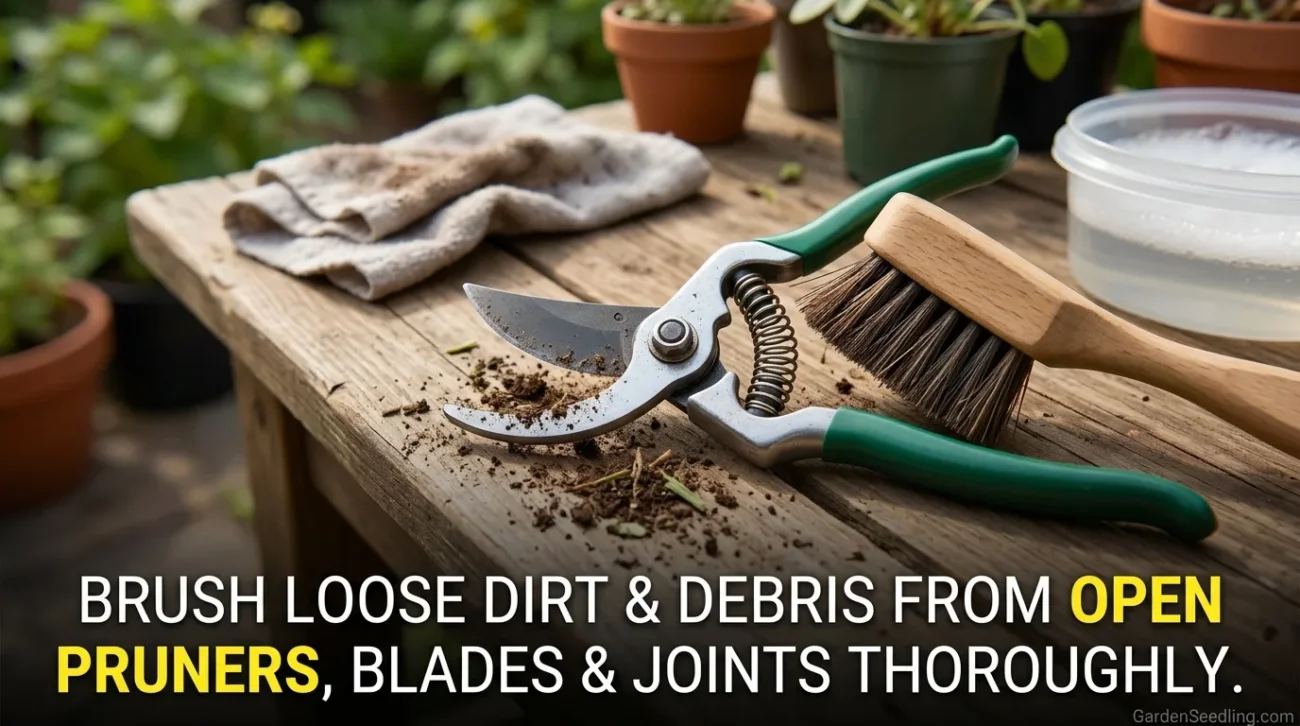
Open the pruners fully. Brush around the blade, hook, spring, handle joint, and pivot. Pay close attention to the tight groove where the cutting blade passes the lower jaw on bypass pruners. That pocket collects thin strips of stem, dried sap, and soil.
For dried mud, use a damp rag first. If the handles are grimy, a small amount of dish soap and warm water is fine. Keep water away from the pivot as much as possible, and never leave pruners soaking in a bucket. Water sitting inside the joint can lead to rust later.
Step 2: Wipe Away Sap
Sap is usually the sticky part. It can look amber, greenish, or almost black depending on what you cut. A rag with rubbing alcohol often removes it well. For stubborn residue, rub gently with steel wool or fine sandpaper. Work slowly. You want to remove sap, not scrape deep marks into the blade.
On pruners used for pine, fig, milkweed, or other sticky plants, sap may harden like thin glue. In that case, soften the residue with alcohol, let it sit for a minute, then wipe again. Small motions work better than hard scrubbing.
Step 3: Remove Light Rust
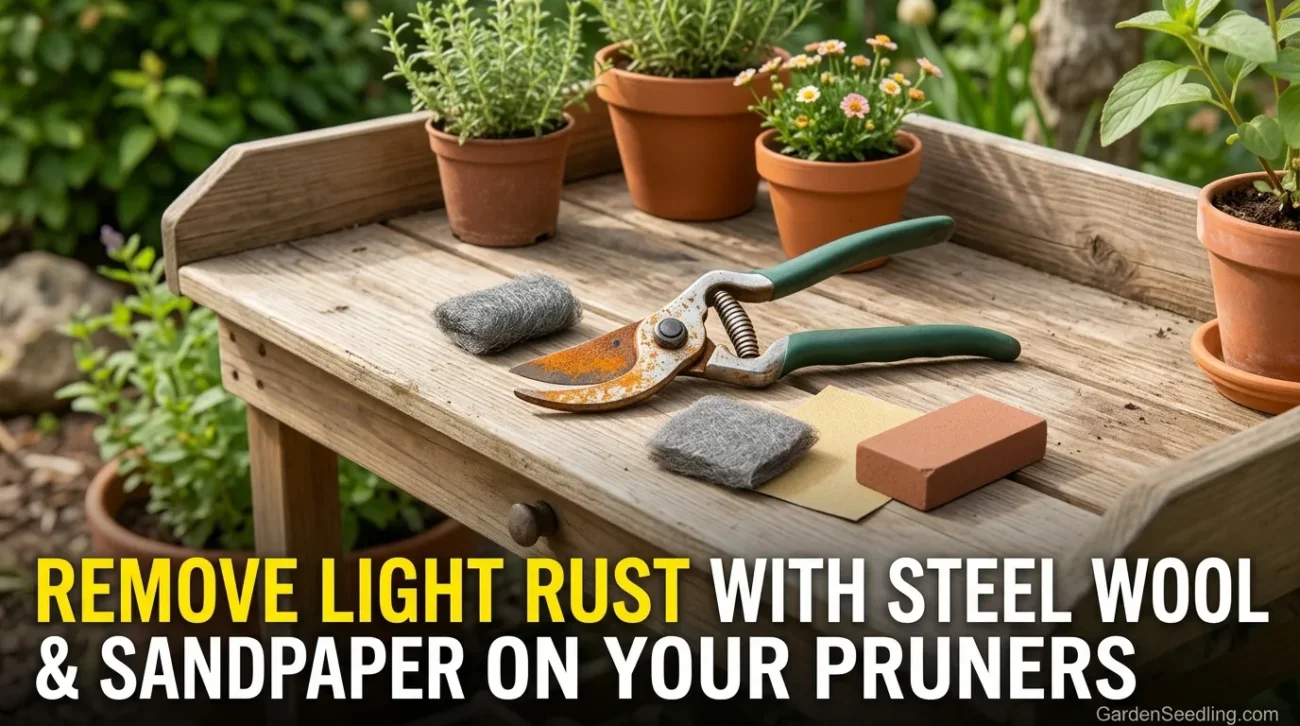
Light orange surface rust can usually be cleaned. Use fine steel wool, a rust eraser, or very fine sandpaper and rub along the metal. If the blade has deep pits, chips, or a bent cutting edge, sharpening may improve it but will not make it new.
Be honest with the tool. A badly damaged blade can keep tearing stems even after careful sharpening. For a good pair of pruners, replacement blades may be worth it. For cheap pruners, replacement often costs nearly as much as buying a new pair.
Disinfect the Blades the Right Way
Cleaning removes dirt. Disinfecting helps reduce the chance of spreading plant disease. Those are two separate jobs, and both matter when pruning sick plants.
For home gardeners, 70% isopropyl alcohol is usually the easiest choice. Spray or wipe the blade surfaces, including both sides of the cutting blade and the lower jaw. Let the alcohol stay wet briefly, then let the tool air-dry or wipe it dry with a clean rag.
A diluted bleach solution can also disinfect tools, but it can corrode metal if left on blades. If you use bleach, mix 1 part household bleach with 9 parts water, apply it to the blade, then rinse and dry the tool well afterward. Never mix bleach with vinegar, ammonia, or other cleaners. That is not garden advice; that is basic safety.
| Task | Best Home Option | Use It For | Watch Out For |
|---|---|---|---|
| Removing dirt | Brush, rag, warm water | Soil, dry plant bits, handle grime | Dry metal parts soon after cleaning |
| Removing sap | 70% rubbing alcohol | Sticky blades after pruning shrubs, herbs, or trees | Keep away from flame |
| Disinfecting | 70% isopropyl alcohol | Between plants, after diseased cuts | Let it contact the blade before wiping dry |
| Heavy disinfecting | 1:9 bleach-to-water mix | Non-routine cleanup after disease issues | Rinse, dry, and oil because bleach is harsh on metal |
| Light rust | Fine steel wool | Surface rust and dull-looking metal | Do not grind away the blade shape |
How to Sharpen Garden Pruners at Home
Most garden pruners have one sharpened side. That angled face is called the bevel. The opposite side is usually flatter. Your goal is simple: follow the existing bevel and refresh the edge. Do not invent a new angle.
Step 1: Find the Beveled Edge
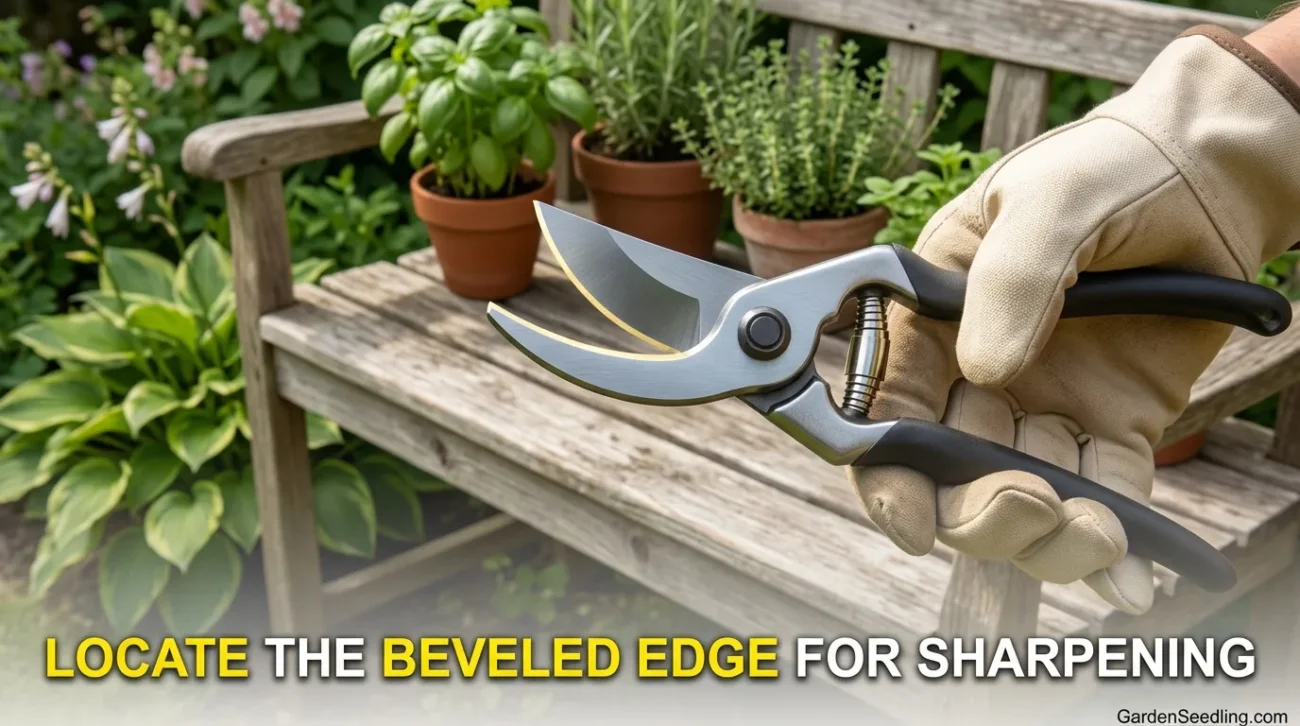
Open the pruners and look at the cutting blade. On bypass pruners, the beveled edge is usually on the outside of the curved cutting blade. You will see a narrow angled strip along the edge. That is the part to sharpen.
On anvil pruners, the cutting blade meets a flat base instead of sliding past a curved hook. The blade still has a bevel. Sharpen that angled edge, then check that the blade closes cleanly against the anvil.
Step 2: Hold the File at the Existing Angle
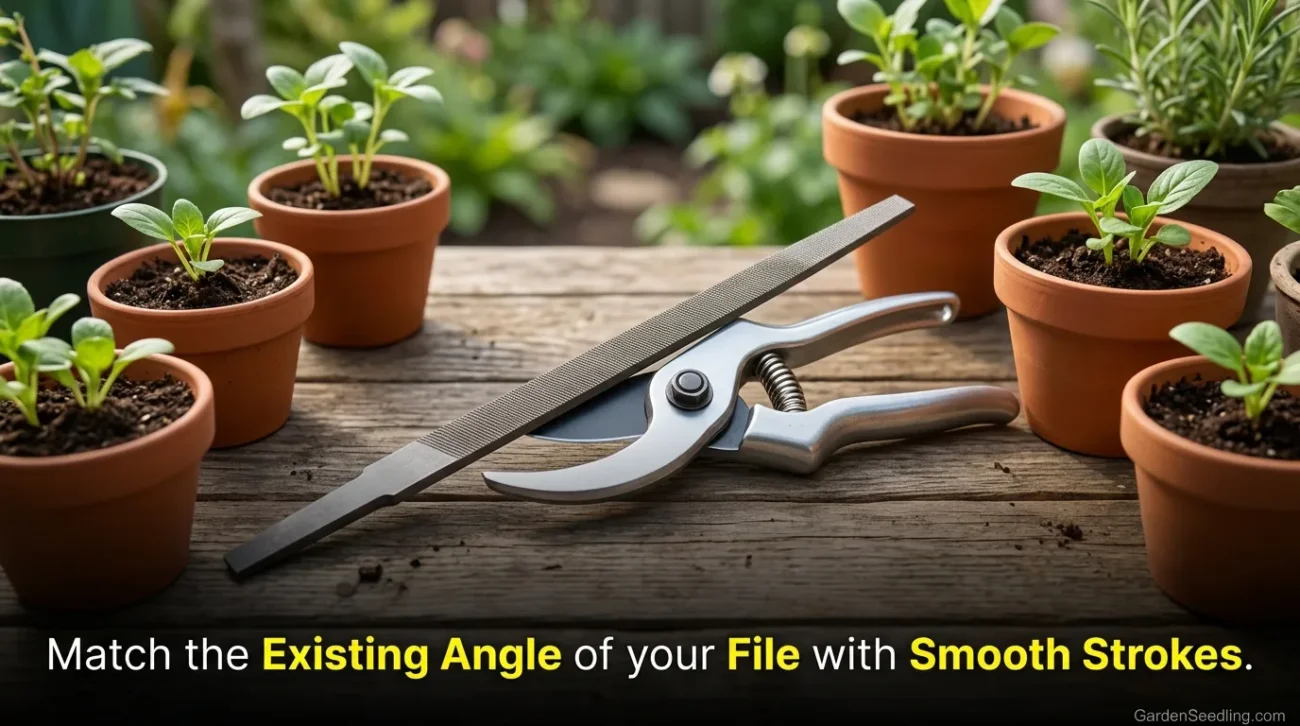
Place the file against the bevel. Most pruner bevels sit somewhere around a low slant, often roughly 20 to 30 degrees, but the exact number matters less than matching what is already there. If the file lies flat against the bevel, you are close.
Push the file away from your body in smooth strokes. Lift it on the return stroke. Filing back and forth can feel faster, but it gives you less control and can rough up the edge.
Step 3: Use Short, Even Strokes
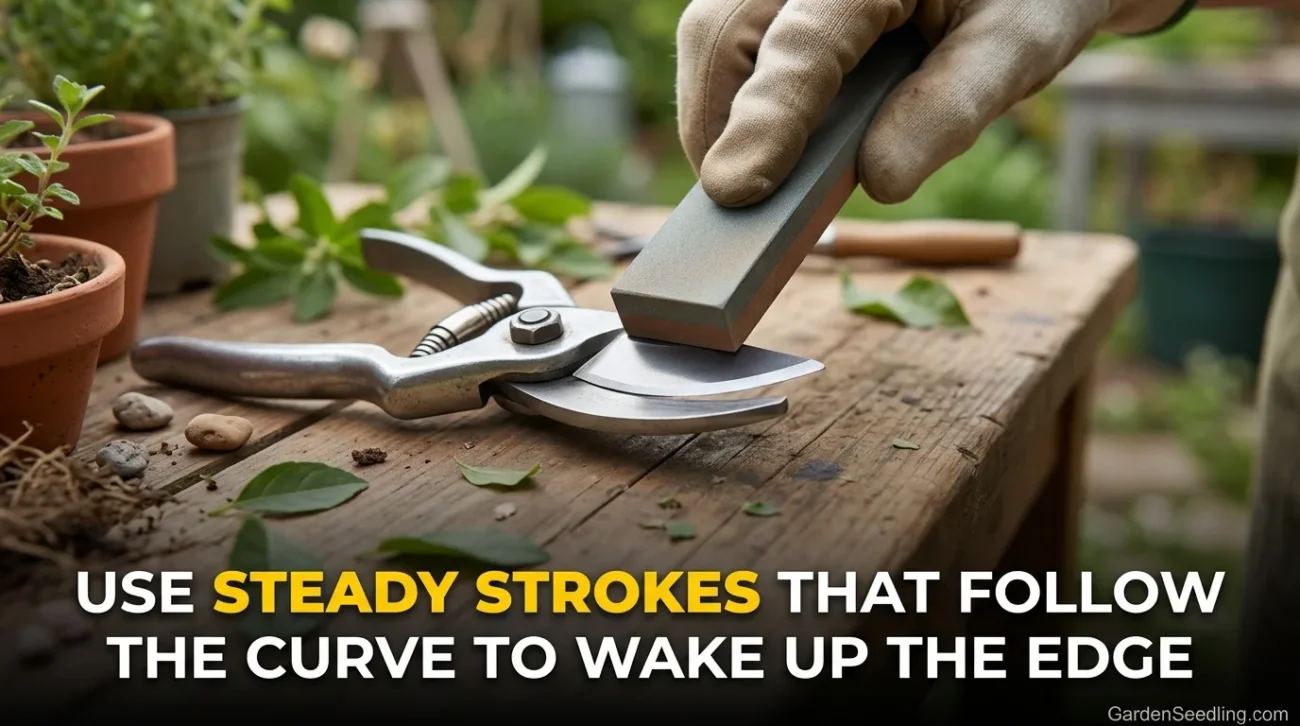
Work from the base of the blade toward the tip. Use steady strokes that follow the curve. Five to ten passes may be enough for a lightly dull blade. A neglected pruner may need more, but do not rush it.
After a few passes, stop and look. The bevel should become cleaner and brighter. You are not trying to remove a lot of metal. You are waking up the edge.
Step 4: Remove the Burr
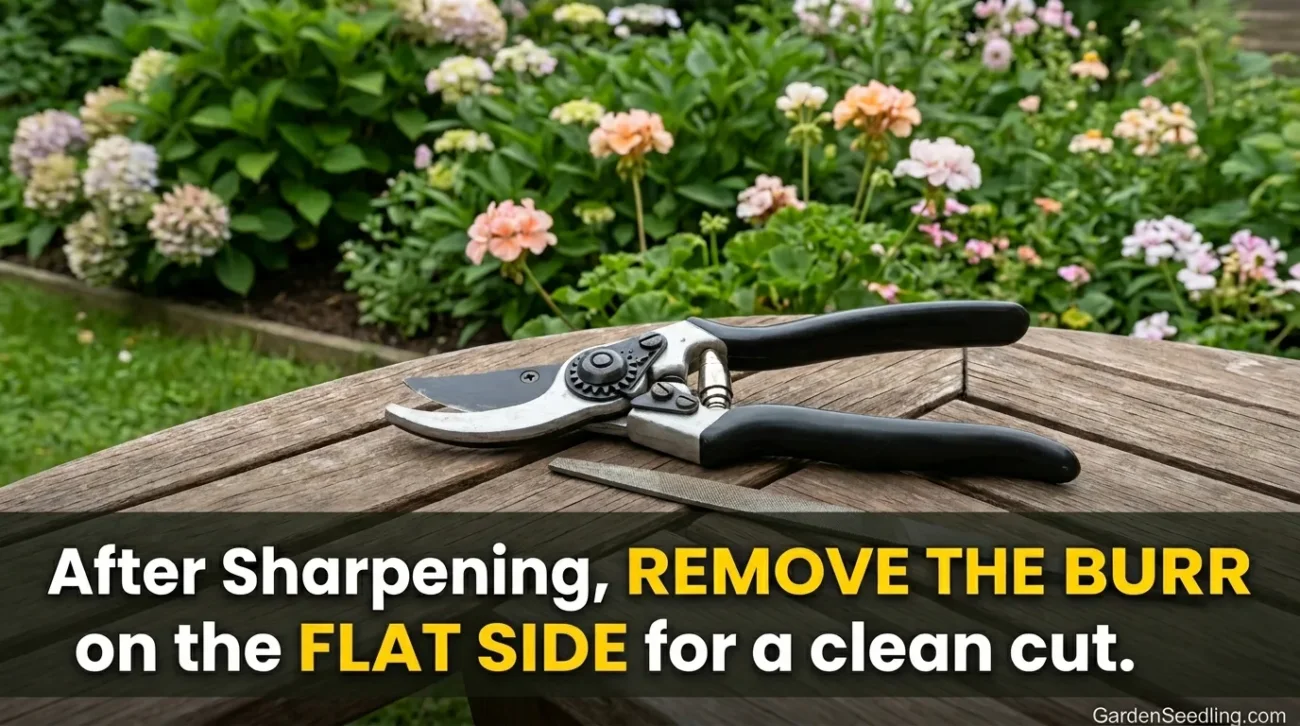
When you sharpen one side, a tiny wire-like burr can form on the flat side of the blade. Open the pruners, turn the blade over, and make one or two very light passes on the flat side. Keep the file nearly flat. Do not create a second bevel there.
This little step matters. A burr can fold over during pruning and make a freshly sharpened blade feel dull again.
Step 5: Test the Cut
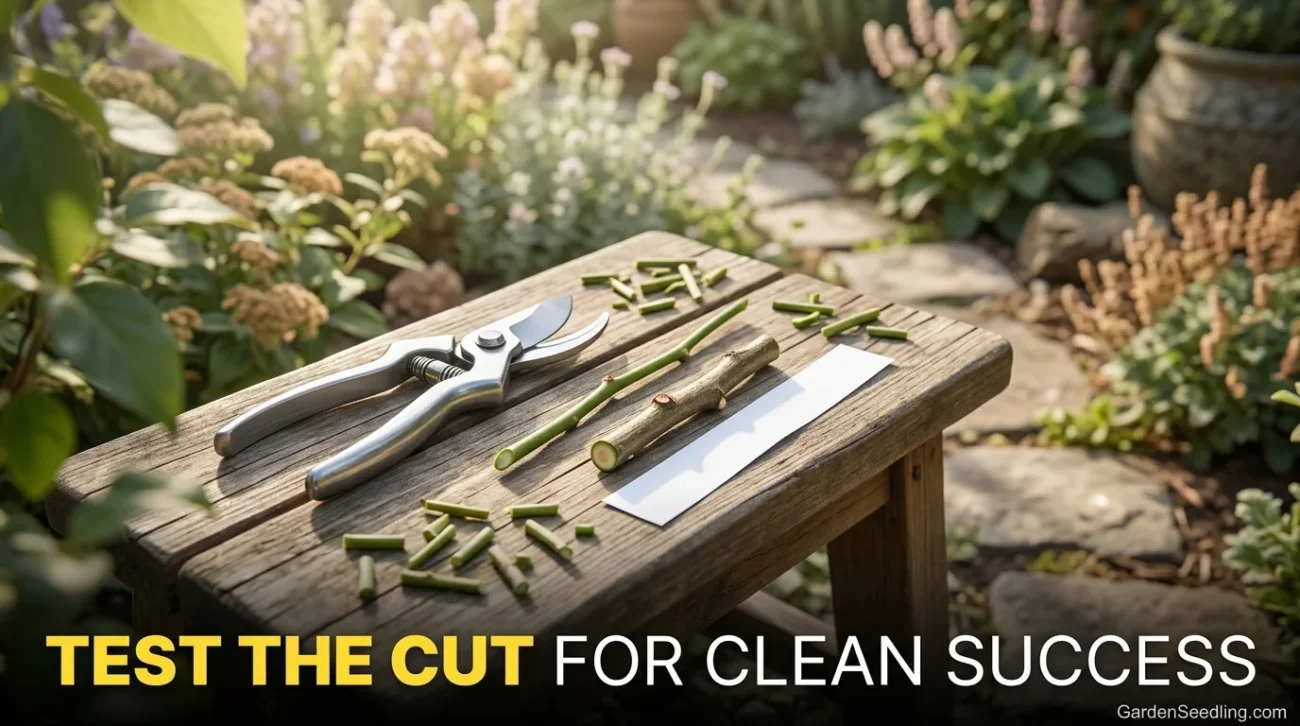
Try cutting a thin green stem, a small twig, or a strip of paper. The pruners should close smoothly and cut without chewing. If the stem bends, crushes, or tears, the edge may need a few more passes—or the pivot may be too loose.
Do not test sharpness with your finger. Obvious, yes. Still worth saying.
Adjust the Pivot and Spring
Sometimes pruners feel dull because the blade is loose, not because the edge is bad. If bypass blades do not pass close enough together, they can pinch stems instead of slicing them.
Open and close the pruners slowly. The movement should feel smooth but not sloppy. If the blades wiggle sideways, tighten the pivot nut slightly. If the handles feel stiff or the blades do not reopen easily, loosen the nut a little and add one small drop of oil at the pivot.
The spring should push the handles open without sticking. If the spring is rusty, weak, or bent, cleaning may not fix it. Many better pruners allow spring replacement, and that small part can make an old tool feel useful again.
Oil the Blade and Store It Dry
After cleaning, disinfecting, and sharpening, wipe the whole metal area dry. Then apply a thin coat of mineral oil, camellia oil, or general tool oil to the blade and pivot. A drop is usually enough. Too much oil attracts dust and grit.
Open and close the pruners a few times to move oil into the joint. Wipe off extra oil from the handles and blade surface. Store the pruners closed, locked, and dry. A wall hook, toolbox, garden caddy, or shelf is better than leaving them in damp potting soil or on a patio table overnight.
For gardeners who grow vegetables organically, tool care also fits into basic garden hygiene. Clean pruners before cutting healthy seedlings, herbs, and edible crops. After trimming diseased tomato leaves, powdery mildew on squash, black spot on roses, or suspicious cankers on shrubs, disinfect before the next plant. Small habit, big difference.
How Often Should You Clean and Sharpen Pruners?
Clean pruners after each pruning session if they touched soil, sap, diseased growth, or wet plant material. For light harvesting—cutting basil, flowers, or a few lettuce stems—a quick wipe may be enough.
Sharpening depends on use. A gardener who prunes roses, shrubs, and woody herbs every week may need to sharpen every few weeks during the growing season. A beginner gardener using pruners mostly for seedling cleanup and harvesting may only need sharpening a few times a year.
- Clean after every use: Best for sap, wet leaves, and disease prevention.
- Disinfect between sick plants: Especially when pruning diseased stems or suspect leaves.
- Sharpen when cuts look ragged: Crushed stems are the clearest clue.
- Oil after wet cleaning: This helps prevent rust around the blade and pivot.
Common Mistakes That Damage Pruners
Most pruner problems come from small bad habits repeated over time. None of them seem serious in the moment. Then one day the pruners feel sticky, dull, and loose all at once.
Sharpening Both Sides Like a Kitchen Knife
Many pruners are not sharpened like a kitchen knife. Bypass pruners usually need sharpening on the beveled side only. If you grind both sides, you can change how the blades meet, and the tool may start chewing instead of slicing.
Using Pruners on Branches That Are Too Thick
Hand pruners are for small stems and branches. If you have to twist, wrench, or use both hands with force, stop. Use loppers or a pruning saw. Forcing pruners through thick wood can bend the blade, loosen the pivot, or crack the handle.
Leaving Sap on the Blade
Sap hardens. Dirt sticks to it. Then the blade drags through every cut like it has a thin coat of gum on it. Wipe sap off the same day you prune, especially after cutting conifers, fruit trees, figs, or woody herbs.
Putting Tools Away Wet
Rust loves neglect. Dry the blade, spring, and pivot area before storage. This is extra important in humid climates, coastal areas, and unheated sheds where tools sit through cold, damp nights.
Skipping Disinfection After Diseased Plants
If you prune a sick plant and move straight to a healthy one, the blades may carry infected sap or plant residue. It does not guarantee disease will spread, but it raises the risk. A fast alcohol wipe is easy insurance.
Bypass vs. Anvil Pruners: Does Sharpening Change?
The basic idea stays the same, but the blade contact is different.
| Pruner Type | Best For | Sharpening Note | Cleaning Focus |
|---|---|---|---|
| Bypass Pruners | Live stems, roses, vegetables, flowers, herbs | Sharpen the beveled cutting blade and keep blade alignment tight | Clean the groove where the blade passes the hook |
| Anvil Pruners | Dry stems and dead wood | Sharpen the blade and check the flat anvil surface for wear | Remove crushed plant bits from the anvil base |
| Garden Snips | Seedlings, herbs, flowers, soft stems | Use very light sharpening; the blades are thinner | Wipe sap and moisture after harvest work |
For most vegetable and flower gardens, bypass pruners are the better everyday choice because they make cleaner cuts on living stems. Anvil pruners can work well on dead wood, but they may crush soft green stems. Different tools, different jobs.
Practical Tips for Cleaner Cuts
Sharp pruners help, but technique matters too. Cut just above a leaf node or bud when shaping plants. Angle the cut slightly so water does not sit on the wound. On tomatoes and other soft-stemmed plants, avoid pruning when leaves are wet if you can; dry foliage is easier to handle and less messy on the blade.
For roses, shrubs, and young fruit trees, cut with the base of the pruner blade rather than the very tip when the stem is firm. The base gives more leverage and helps the blade stay aligned. For herbs and flowers, use the cleanest part of the blade and avoid squeezing the handles after the cut is already complete. That extra squeeze does nothing useful.
One more small thing: keep one pair for clean harvesting and another for rough shrub work if your budget allows. The “good” pair stays sharper longer, and the rough pair can handle woody stems, twine, and garden jobs that are not quite pruning but somehow always happen.
When Cleaning and Sharpening Are Not Enough
Some pruners reach a point where home care cannot fix the problem. Look for bent blades, deep chips, cracked handles, missing springs, loose locks, or a pivot screw that no longer holds tension. If the blade edge has rolled over badly, a small file may not restore it evenly.

Replace the blade if the pruner model allows it. Replace the whole tool if the handles flex, the lock fails, or the blade no longer meets the lower jaw correctly. A sharp edge still needs good alignment. Without that, the cut will always feel a bit wrong.
FAQ
Can You Use WD-40 to Clean Garden Pruners?
It can help loosen grime or light rust, but it is not a disinfectant and it is not the best final blade oil for every gardener. After using it, wipe the tool clean and apply a thin coat of mineral oil or tool oil for storage.
Should You Sharpen Pruners Before or After Cleaning?
Clean first, then sharpen. Dirt, sap, and rust can hide the bevel and clog the file. A clean blade is easier to sharpen evenly.
What Is the Best Disinfectant for Pruning Shears?
For most home gardeners, 70% isopropyl alcohol is the easiest option. It is fast, widely available, and does not need rinsing like bleach. Let it contact the blade, then dry the tool before storage.
How Do You Know When Pruners Are Sharp Enough?
They should cut a green stem cleanly without crushing it. If the stem bends, tears, or comes out ragged, sharpen a little more and check the pivot tension.
Can You Sharpen Cheap Garden Pruners?
Yes, as long as the blade is not badly bent or chipped. Cheap pruners may not hold an edge as long, but cleaning, sharpening, and oiling can still improve them.
Do You Need to Take Pruners Apart to Clean Them?
Not every time. For routine cleaning, open the blades and brush around the pivot. Take them apart only when grime is packed inside the joint or the tool needs deeper maintenance.
Clean pruners are easier on plants and easier on your hands. Keep a small rag, alcohol, file, and oil nearby, and the job becomes a short habit instead of a once-a-year rescue mission. Sharp tools make quiet work of a garden. That is the point.