A flower bed can look neat on the same day you spread mulch, then quietly suffer two weeks later if the mulch is piled too deep, pressed against stems, or packed over wet soil. Mulch is helpful, yes, but it works best as a loose surface layer — not as a blanket that seals the bed shut.
- Quick Answer: The Right Way to Mulch Flower Beds
- Why Flower Beds Need Mulch, But Not Too Much
- Choose the Best Mulch for Flower Beds
- Shredded Bark or Hardwood Mulch
- Compost as Mulch
- Pine Straw
- Leaf Mold or Shredded Leaves
- Gravel or Stone Mulch
- When to Mulch Flower Beds
- How Deep Should Mulch Be in Flower Beds?
- Use Thinner Mulch Around These Plants
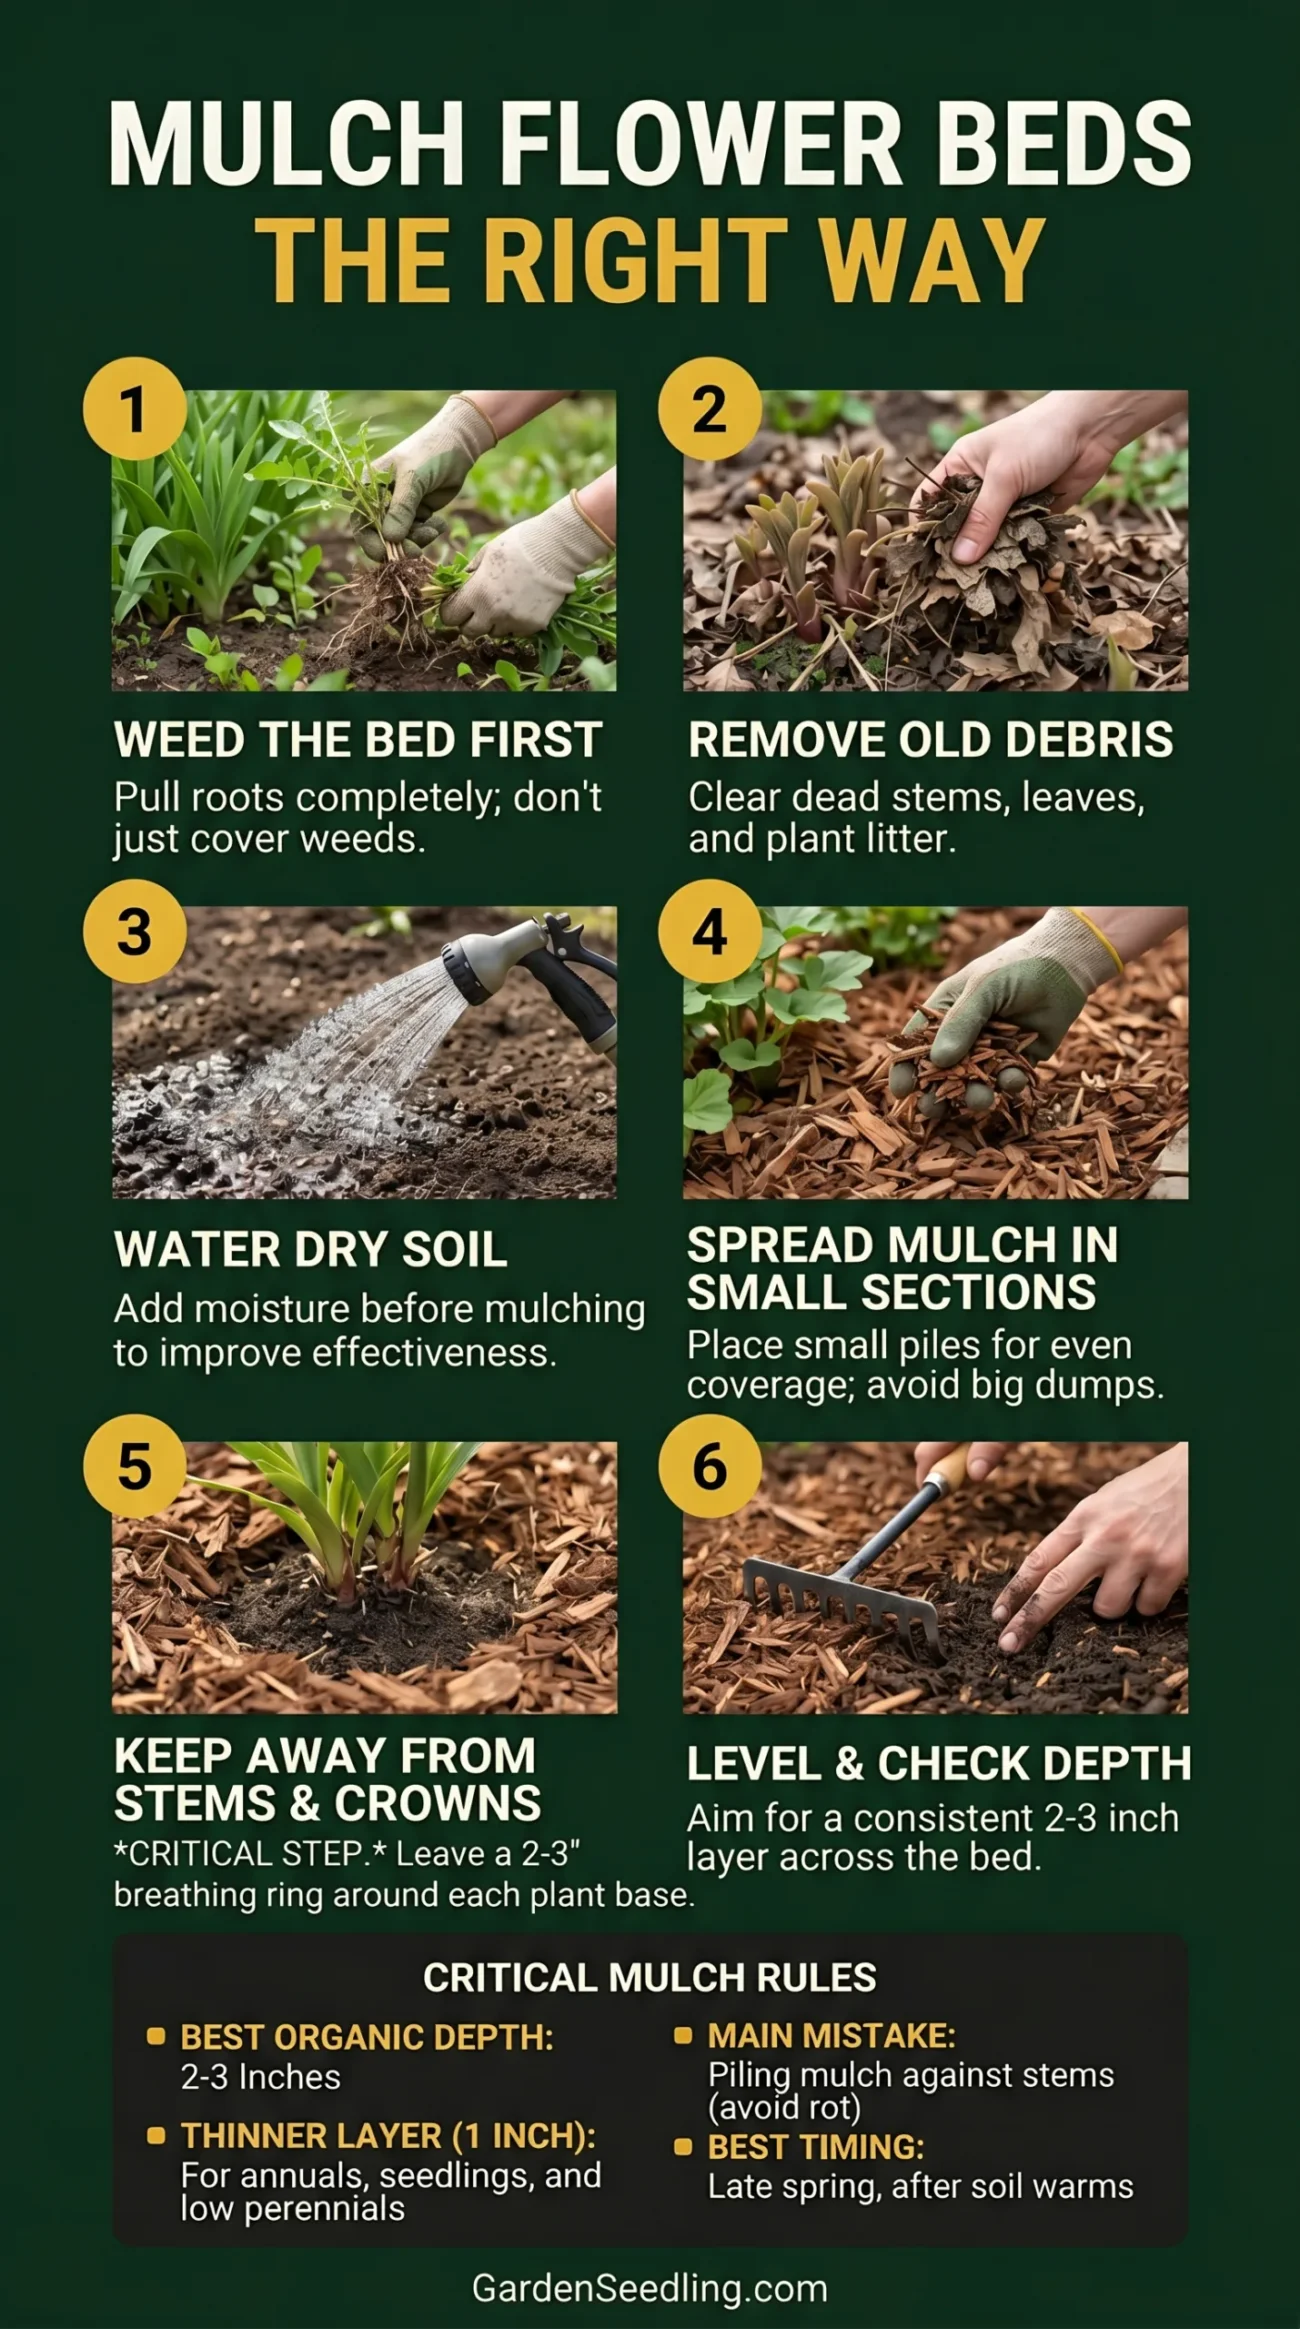
- How to Mulch Flower Beds Step by Step
- Step 1: Weed the Bed First
- Step 2: Remove Packed Leaves and Old Debris
- Step 3: Water Dry Soil Before Mulching
- Step 4: Spread Mulch in Small Sections
- Step 5: Keep Mulch Away From Stems and Crowns
- Step 6: Level the Mulch, Then Check the Depth
- How to Mulch Around Different Types of Flowers
- Annual Flower Beds
- Perennial Flower Beds
- Bulb Beds
- Rose Beds
- Common Mulching Mistakes That Smother Plants
- Piling Mulch Against Stems
- Using Too Much Mulch
- Mulching Over Wet, Cold Soil
- Using Fresh Wood Chips Too Close to Small Plants
- Letting Mulch Form a Hard Crust
- Should You Remove Old Mulch Before Adding New Mulch?
- Watering Flower Beds After Mulching
- Practical Tips for a Cleaner, Healthier Flower Bed
- How to Tell If Mulch Is Hurting Your Flowers
- FAQ
- Can You Put Mulch Directly Around Flowers?
- How Many Inches of Mulch Should a Flower Bed Have?
- Will Flowers Grow Through Mulch?
- Is It Better to Mulch Before or After Planting Flowers?
- Can Too Much Mulch Kill Flowers?
- How Often Should You Replace Mulch in Flower Beds?
When you mulch flower beds the right way, you help soil hold moisture, reduce weed pressure, soften soil temperature swings, and give the bed a cleaner edge. The trick is simple: use the right material, spread it at the right depth, and keep it away from plant crowns and stems. Too much mulch can trap excess moisture, limit airflow, and invite rot around the base of your flowers.
Quick Answer: The Right Way to Mulch Flower Beds
For most flower beds, spread mulch 2 to 3 inches deep over clean, lightly watered soil. Keep mulch about 2 to 3 inches away from plant stems and avoid burying crowns, low leaves, seedlings, or new shoots. Use a thinner layer around delicate annuals and young perennials.
That is the safe middle. Not too bare. Not too smothered.
- Best depth for most beds: 2 to 3 inches
- Best depth around small plants: 1 to 2 inches
- Space around stems: 2 to 3 inches clear
- Best timing: after soil has warmed in spring, or after cleanup in fall
- Main mistake to avoid: piling mulch into mounds around plant bases
Why Flower Beds Need Mulch, But Not Too Much
Mulch does several useful jobs in a flower bed. It shades the soil surface, slows evaporation, blocks many weed seeds from getting enough light, and reduces soil splash during rain or watering. That last part matters more than people think. Soil splash can move disease spores onto lower leaves, especially in crowded beds.
Still, mulch is not plant food by itself, and it is not a fix for poor planting, compacted soil, or bad drainage. It sits on top of the soil and changes the small environment around the roots. Done well, it helps. Done poorly, it causes trouble in a very quiet way.
Too much mulch can keep the soil too wet around crowns. It can also make shallow-rooted flowers struggle because oxygen moves less freely through soggy, compressed layers. Around plants like lavender, salvia, yarrow, coneflower, sedum, and other flowers that dislike wet feet, heavy mulch can be especially rough.
Choose the Best Mulch for Flower Beds
The best mulch depends on the look you want, the plants you grow, and how often you want to refresh the bed. For most home flower beds, organic mulch is the easiest choice because it looks natural and slowly breaks down into the soil surface.
Shredded Bark or Hardwood Mulch
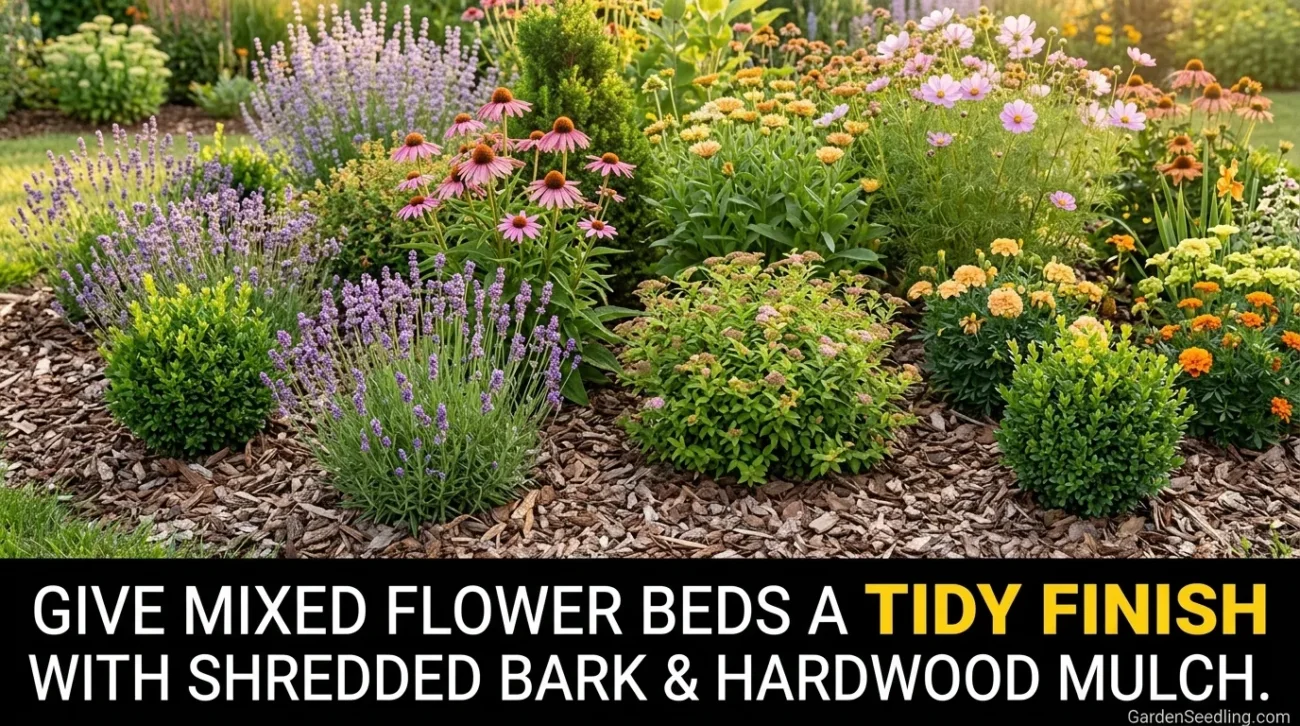
Shredded bark and hardwood mulch work well in mixed flower beds with perennials, shrubs, and larger annuals. They stay in place better than big bark chunks and give the bed a tidy, finished look.
Use it lightly near soft-stemmed flowers. Around small annuals, a thick bark layer can feel like a heavy coat in warm weather.
Compost as Mulch

Finished compost can act as a thin mulch and soil improver. It is useful around annual flowers, cottage-style beds, and areas where you replant often. Spread it about 1 inch deep, not 3 inches deep like bark mulch.
There is one catch: compost may not block weeds as strongly as wood mulch because it is finer and more soil-like. It feeds the top layer nicely, though.
Pine Straw
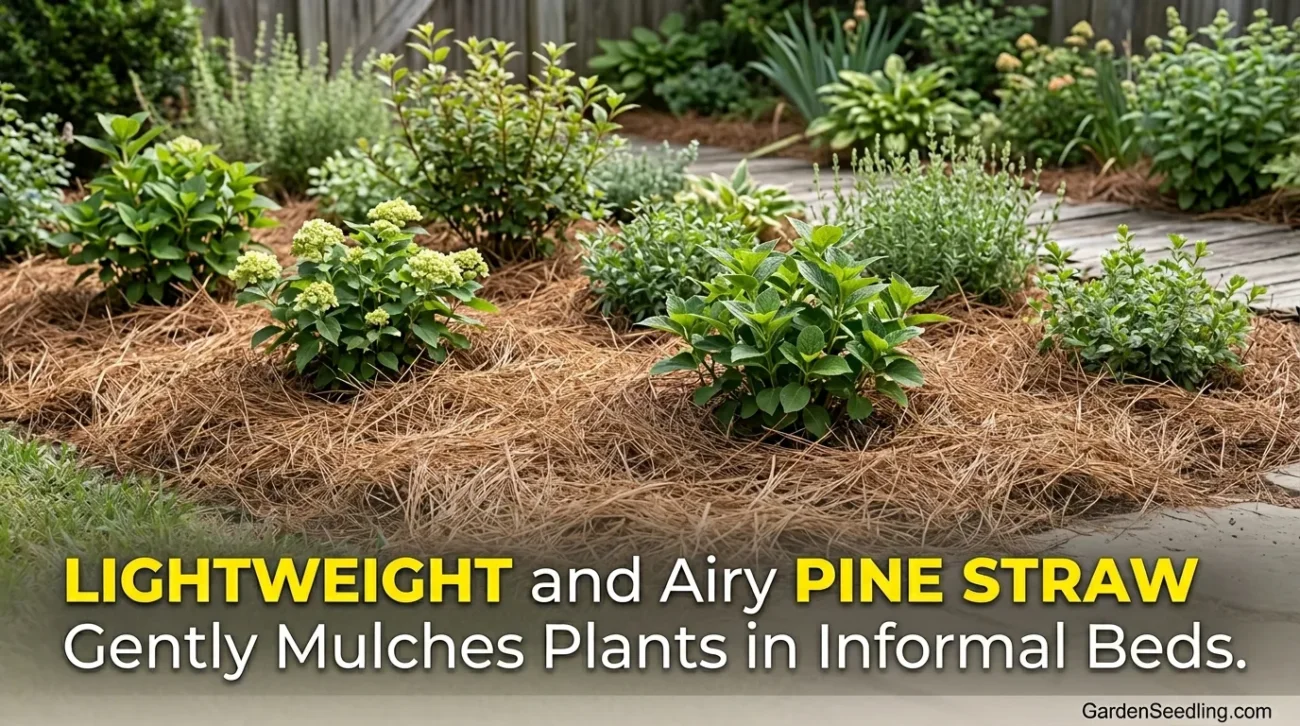
Pine straw is light, airy, and easy to tuck around established plants without crushing them. It works nicely in informal beds and around acid-loving plants, though it does not make soil sharply acidic just by sitting on top.
It can blow around in exposed spots until it settles. In a sheltered bed, it behaves better.
Leaf Mold or Shredded Leaves
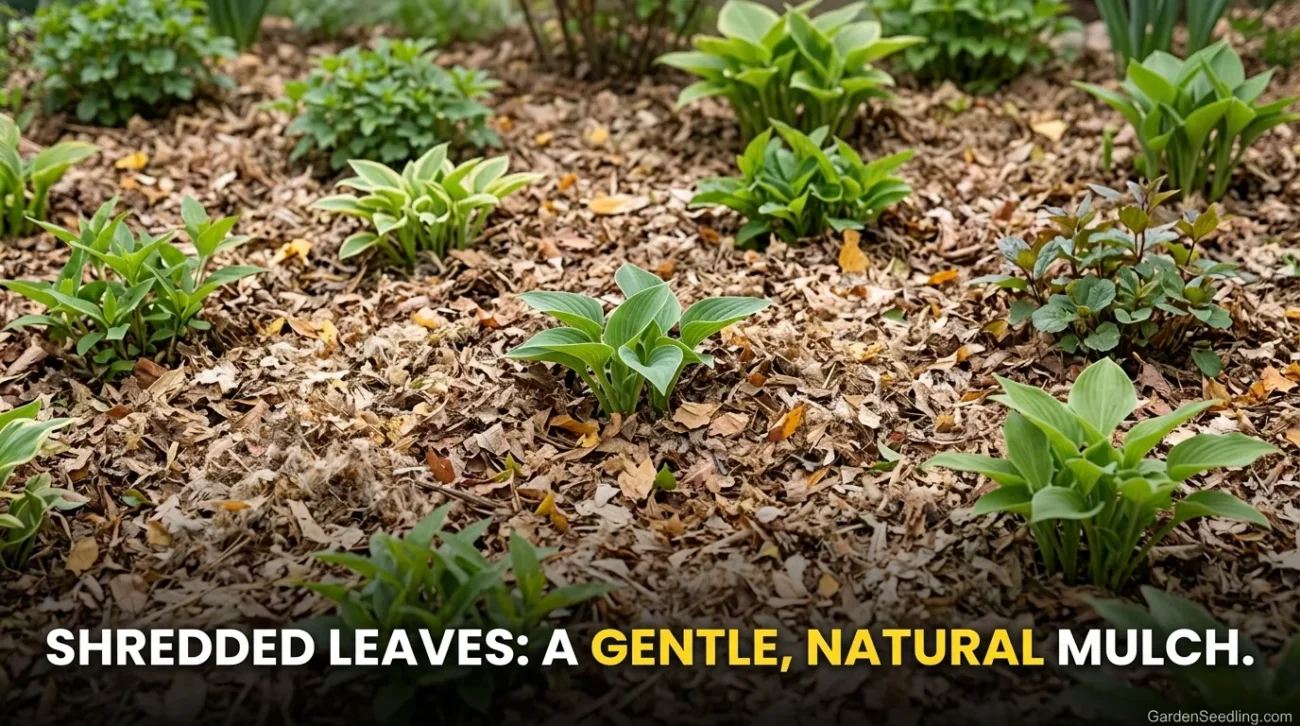
Shredded leaves are one of the most natural mulches for flower beds. They are soft, easy for soil life to break down, and gentle around perennials. Whole leaves, however, can mat together and block water. Chop them first.
Not perfect-looking, maybe. But very useful.
Gravel or Stone Mulch
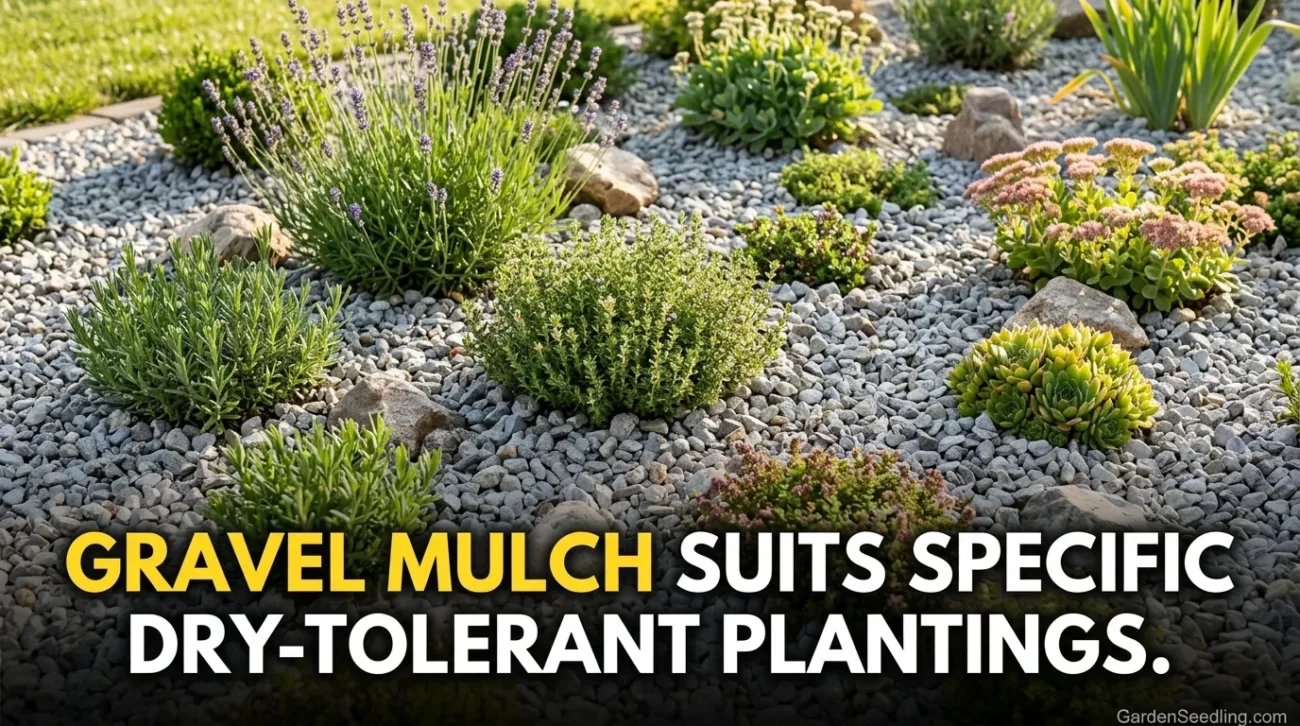
Gravel can suit dry gardens, alpine-style beds, Mediterranean herbs, and plants that prefer sharper drainage. It is not the best match for every flower bed because it can heat the soil and is hard to remove later.
Use stone only where you are sure the planting style fits. Once it mixes into soil, cleanup gets annoying fast.
| Mulch Type | Best For | Recommended Depth | Main Caution |
|---|---|---|---|
| Shredded Bark | Perennial beds, mixed borders, larger plantings | 2 to 3 inches | Keep away from stems and crowns |
| Finished Compost | Annual beds, soil improvement, light mulching | About 1 inch | May allow more weeds than wood mulch |
| Pine Straw | Natural beds, woodland edges, light coverage | 2 to 3 inches, loosely spread | Can shift in windy areas |
| Shredded Leaves | Perennials, native beds, soil-friendly gardens | 1 to 2 inches | Whole leaves can mat and block water |
| Gravel | Dry gardens, drainage-loving plants | 1 to 2 inches | Can heat soil and is hard to remove |
When to Mulch Flower Beds
The best time to mulch flower beds is usually mid to late spring, after the soil has warmed and plants are actively growing. Mulching too early can keep cold soil cold, especially in northern climates. Small plants may sit there sulking, roots slow, top growth slow. It happens.
In warm regions, you can mulch earlier because soil temperatures rise sooner. In hot summer areas, a fresh mulch layer before deep heat arrives can help flowers handle dry spells with less stress.
Fall is also a good time to mulch perennial beds, but the goal changes. In fall, mulch helps protect soil from erosion and reduces repeated freeze-thaw movement around roots. Do not bury plant crowns before winter. A loose layer around the bed is enough.
How Deep Should Mulch Be in Flower Beds?
Most flower beds do best with 2 to 3 inches of organic mulch. That depth blocks many weeds and helps hold soil moisture without sealing the surface too tightly. Around small plants, seedlings, and low-growing flowers, stay closer to 1 inch until the plants size up.
Depth matters more than people expect. A half-inch dusting looks nice for a few days but does little for weeds or moisture. A 5-inch pile may look tidy, but it can hold too much moisture and smother plant crowns. The middle range works better.
Use Thinner Mulch Around These Plants
- Small annuals: pansies, petunias, alyssum, lobelia, and young marigolds
- Low-growing perennials: creeping phlox, dianthus, coral bells, and ajuga
- Dry-loving flowers: lavender, sedum, salvia, yarrow, and blanket flower
- New transplants: any flower that still has a small root system
- Bulb shoots: tulips, daffodils, lilies, and alliums as they emerge
For these plants, keep the mulch light and open. You can always add more later, but digging mulch out from around a stressed plant is a small mess.
How to Mulch Flower Beds Step by Step
Mulching is not hard work, but the order matters. Prepare the bed first, then spread mulch. Do not use mulch to hide weeds, tangled leaves, or soil that already feels swampy.
Step 1: Weed the Bed First
Pull weeds before mulching. Get the roots where you can, especially with perennial weeds such as bindweed, quackgrass, nutsedge, or creeping charlie. Mulch can slow new weed seeds, but it will not politely erase weeds already growing underneath.
For small weeds, a hand hoe or weeding knife works fast. For deep-rooted weeds, loosen the soil first so you do not snap the root and leave the stubborn part behind.
Step 2: Remove Packed Leaves and Old Debris
Clear dead stems, matted leaves, and old plant debris that sits right against crowns. A little natural leaf litter is fine in some beds, but thick wet clumps can trap moisture around tender growth.
Look closely around perennials. New shoots often hide under old stems in spring, and they are easy to break if you rake hard.
Step 3: Water Dry Soil Before Mulching
If the soil is dry, water it before adding mulch. Mulch slows evaporation, which is helpful only when moisture already exists in the soil. Spreading mulch over bone-dry soil can make rewetting slower, especially with fine or compacted mulch.
Use a gentle watering pattern. You want the root zone moist, not muddy.
Step 4: Spread Mulch in Small Sections
Dumping one large pile into a flower bed usually leads to broken stems and uneven depth. Instead, place small piles between plants and spread them with gloved hands or a small rake.
Move slowly around tender growth. Around established shrubs or large perennials, a rake is fine. Around young flowers, hands are better.
Step 5: Keep Mulch Away From Stems and Crowns
This is the part that prevents smothering. Leave a small bare ring around each plant base. For most flowers, keep mulch 2 to 3 inches away from the stems. For tiny annuals, even 1 to 2 inches of breathing room helps.
Think of it like a doughnut, not a muffin. The soil can be covered around the plant, but the center stays open.
Step 6: Level the Mulch, Then Check the Depth
After spreading, use your fingers to check depth in a few spots. If your fingers sink through 4 or 5 inches of mulch, pull some back. If you can see bare soil everywhere after one watering, add a little more.
The goal is even coverage, but not a perfect carpet. Flower beds are alive. A slightly uneven, breathable layer beats a packed, flat sheet.
How to Mulch Around Different Types of Flowers
Annual Flower Beds
Annuals usually have smaller root systems when planted, so they need gentle mulching. After planting, water the bed, then tuck mulch between plants at about 1 to 2 inches deep. Keep it away from soft stems.
As annuals grow and fill the bed, you may not need much mulch at all. Dense foliage shades the soil on its own, and too much mulch can make the bed feel crowded.
Perennial Flower Beds
Established perennials can handle a 2- to 3-inch mulch layer between plants, but crowns still need air. Hostas, daylilies, coneflowers, black-eyed Susans, bee balm, phlox, and asters all benefit from mulch around the root zone, not on top of the crown.
In spring, wait until you can see where the new shoots are. Then mulch around them. Not over them.
Bulb Beds
Spring bulbs can push through a light mulch layer, but thick mulch may slow or bend tender shoots. If tulips, daffodils, hyacinths, or alliums are emerging, keep mulch thin until leaves are up and easy to see.
After bulb foliage yellows later in the season, you can refresh mulch lightly to cover bare soil.
Rose Beds
Roses like mulch because it helps conserve moisture and keeps soil from splashing onto leaves. Use 2 to 3 inches of mulch over the root zone, but keep it pulled back from the canes and graft union.
Do not pack mulch into a cone around rose stems. That wet collar can invite problems.
Common Mulching Mistakes That Smother Plants
Piling Mulch Against Stems
This is the classic mistake. Mulch pressed against stems keeps the area damp and reduces airflow. Soft stems may rot, and woody stems can develop bark problems over time.
Pull it back. Simple fix.
Using Too Much Mulch
More mulch does not mean more protection. A deep layer can hold too much water, especially in clay soil or shaded beds. It can also encourage shallow roots because roots stay near the damp surface instead of growing deeper.
If the bed already has old mulch, do not automatically add another full layer. Loosen the old layer first and measure what is still there.
Mulching Over Wet, Cold Soil
In early spring, cold wet soil needs air and warmth. If you cover it too soon, plants may grow slowly and roots may stay chilly. Wait until the soil is workable and plants show steady growth.
Using Fresh Wood Chips Too Close to Small Plants
Fresh wood chips can work in paths and large landscape areas, but they are not the gentlest choice for tender annuals or small perennials. They may be chunky, uneven, and hard to place neatly around delicate stems.
If you use wood chips, keep them on the surface and away from plant bases. Do not mix them into the soil.
Letting Mulch Form a Hard Crust
Some mulches, especially fine shredded products, can knit together and form a crust. Water may run off instead of soaking in. Every few weeks, fluff the surface lightly with your fingers or a hand rake.
Small habit. Big difference.
Should You Remove Old Mulch Before Adding New Mulch?
You do not need to remove old mulch every season unless it smells sour, looks moldy in a dense wet layer, contains disease-heavy plant debris, or has built up too deep. In many beds, old mulch has partly broken down and can stay in place.
Before adding new mulch, loosen the old layer. Check the total depth. If there is already 2 inches of mulch, add only enough to refresh the surface. A light top-up often looks better and treats plants better than a full new load.
If the old layer is thick, pull some out and use it in a path or compost area, as long as it is free of disease and weed seeds. Around flower crowns, clean and open is the safer look.
Watering Flower Beds After Mulching
After mulching, water lightly to settle the material. This helps loose pieces lock into place and removes dusty residue from leaves. Do not blast the bed with a strong stream; it can shove mulch into crowns and flatten young plants.
Later, water based on soil moisture, not just the mulch surface. Mulch may look dry on top while soil underneath still holds moisture. Push a finger into the soil near the root zone. If the top inch or two of soil feels dry, water deeply.
For drip irrigation or soaker hoses, place the hose under the mulch when possible. That sends water straight to the soil and keeps leaves drier.
Practical Tips for a Cleaner, Healthier Flower Bed
- Edge the bed first: A clean edge keeps mulch from spilling into the lawn and makes the whole bed look sharper.
- Use cardboard only with care: It can suppress weeds in new beds, but cut wide openings around plants and avoid stacking it near crowns.
- Skip landscape fabric in most flower beds: It can interfere with planting, trap debris on top, and make future changes harder.
- Match mulch to plant style: Use airy, lighter mulch around delicate plants and coarser mulch in open spaces between larger perennials.
- Refresh, do not bury: Add thin layers over time instead of burying the bed deeper each season.
- Watch shaded beds: They dry slower, so they often need less mulch than sunny borders.
How to Tell If Mulch Is Hurting Your Flowers
Plants usually give warnings before they fail. Yellowing lower leaves, soft stems at the soil line, slow growth, fungus gnats near damp areas, or a sour smell from the bed can point to too much moisture under the mulch.
Check the crown first. If mulch touches the plant base, pull it back and let the area breathe. If the soil feels wet for days after watering or rain, thin the mulch layer and improve airflow between plants.
With dry-loving flowers, watch for floppy growth and darkened stems near the base. Those plants often want sun, drainage, and space more than a thick moisture-holding layer.
FAQ
Can You Put Mulch Directly Around Flowers?
Yes, but do not press it against stems or crowns. Spread mulch around the root zone and leave a small open ring around each plant base.
How Many Inches of Mulch Should a Flower Bed Have?
Most flower beds need 2 to 3 inches of organic mulch. Use 1 to 2 inches around small annuals, seedlings, low-growing flowers, and dry-loving perennials.
Will Flowers Grow Through Mulch?
Some strong perennials and bulbs can grow through a light mulch layer. Small seedlings and tender shoots may struggle under thick mulch, so keep the layer thin until plants are established.
Is It Better to Mulch Before or After Planting Flowers?
For most flower beds, plant first, water well, then mulch around the plants. This makes it easier to keep mulch away from stems and place it only where needed.
Can Too Much Mulch Kill Flowers?
Yes. Too much mulch can hold excess moisture, reduce airflow near crowns, and cause stems or roots to rot. Deep mulch is especially risky in shaded or poorly drained beds.
How Often Should You Replace Mulch in Flower Beds?
You usually only need to refresh mulch once a year. Loosen the old layer first, check the depth, and add a thin top-up instead of piling on a full new layer.
Good mulching is mostly restraint. Keep the layer loose, shallow enough, and pulled back from the plants themselves, and your flower bed gets the benefits without that smothered, overdone look. The plants should look like they are growing through the bed — not fighting their way out of it.